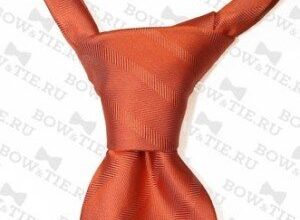
The Eldredge knot is a prime example of unusual tie knots. It is unusual, attractive and fits in 15 steps! The knot was invented by Jeffrey Eldredge not so long ago, in 2007. However, it became known to the public a year later, when images of this site got to the network.
Unlike classic knots, you need to tie the Eldridge knot with the narrow end of the tie, not the wide one. The knot is quite large (even larger than the Windsor knot) and looks like an ear of wheat or other crops. The knot is quite whimsical and it is hard to wear it, every now and then it dissolves from careless socks. If you want to attract and surprise your colleagues or friends – show diligence and tie this unusual Eldridge knot, and success awaits you!

Eldridge Knot
Suitable for collared shirts:
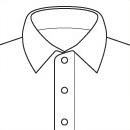
Average

With buttons

Large

With soft ends
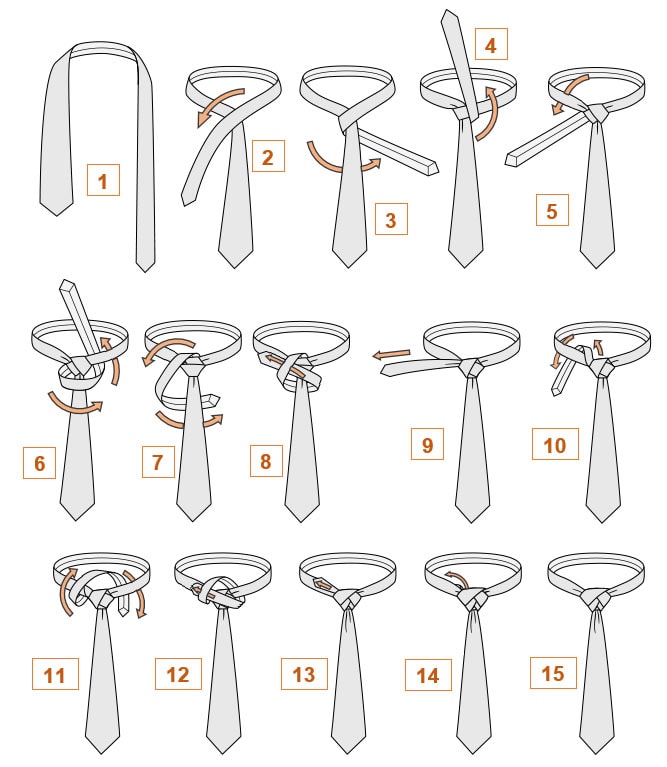
How to tie a tie in pictures: the Eldridge knot
MEN'S TIES IN OUR ONLINE STORE
GO TO STORE
Instructions on how to tie a tie with the Eldridge knot
- Place the inner side of the tie over yourself, with the seams pointing inward. The wide end is on the left and the narrow end is on the right. The tip of the wide end should be pulled out to just below or flush with the belt buckle. We will work with the narrow end of the tie.
- Place the narrow end over the wide end, forming a crosshair.
- Wrap the wide end of the tie from left to right.
- Pull the narrow end towards the neck and pass over the collar (tie) that has formed.
- After wrapping the collar of the tie once, pull it to the left.
- Form the front of the tie knot by horizontally shifting the wide end from left to right and thread through the collar (tie) that has formed.
- As shown in the picture, pull the narrow end down and to the left, then thread it under the wide end of the tie.
- Pass through the loop on the front of the knot that you formed in step 7.
- Pull the narrow end to the left, tightening slightly.
- Fold over the narrow end of the collar, remaining on the left. Pull down.
- Fold over the narrow end of the collar, moving from left to right. Pull out the narrow end to the right.
- Pass through the loop on the front of the knot that you formed in step 11.
- Pull the narrow end to the left, tightening slightly.
- Try to tuck the remaining narrow end of the tie into your shirt collar so that it does not stick out.
- Adjust the resulting knot so that it fits evenly into your collar.