
Almost any modern service requires an Internet connection to one degree or another. It is this circumstance that makes network problems one of the most unpleasant for users. Find out how to fix the 'Wireless Network – Disabled' error preventing Wi-Fi from being used by our experts.
Checking the status of the Wi-Fi module
Step # 1 to fix the error – Wireless – Disabled.
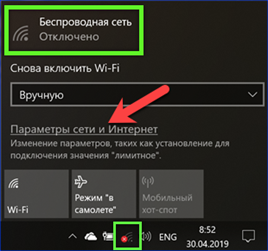
In general, the user is faced with the following picture. In the system tray, the Wi-Fi icon is inactive and marked with a cross in a red circle. By clicking on it to view the list of available networks, we find the inscription 'Wireless network – Disabled'. The virtual 'Wi-Fi' and 'Airplane mode' buttons below it are not highlighted or are inactive.
When faced with the described problem, first of all, you should check if the wireless module is turned on. Click the hyperlink indicated by the arrow in the screenshot. It will take us to the 'Network and Internet' section of the parameters Windows.
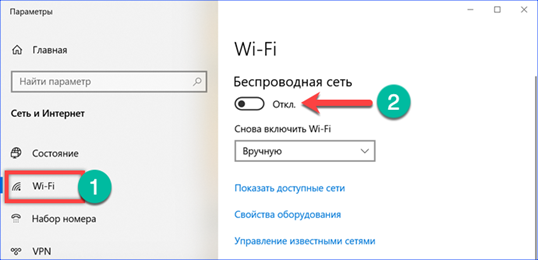
On the quick access panel, select the 'Wi-Fi' item. In the right part of the window, pay attention to the state of the switch. If it is in the position shown in the screenshot, turn it on.
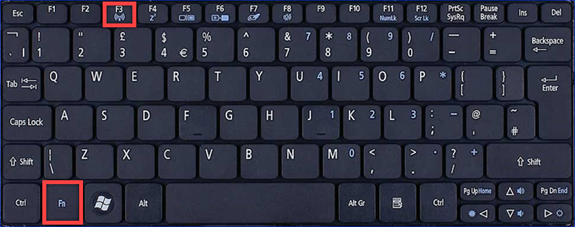
Computer hardware designers and designers often have limitless imaginations. Therefore, if turning on the software switch did not help, you should take a closer look at the keyboard and laptop case. The photo below shows one of the possible options for placing the button for turning on the wireless module. To activate it, you need to press simultaneously 'Fn' and 'F3'. The top row function key may differ depending on the brand and model of your laptop.
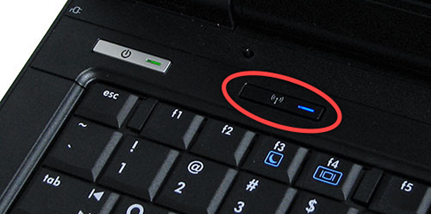
Some manufacturers provide a dedicated physical button to control the Wi-Fi module. It is usually located above the keyboard in the right or left corner and can be equipped with LED backlighting.
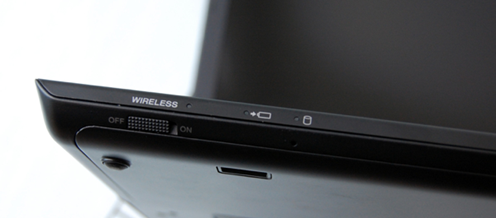
There are models equipped with a two-position switch on the end faces of the case. They are usually labeled 'Wireless', 'Wi-Fi' or an antenna icon. Additionally, a status LED or an 'ON / OFF' position indicator can be used.
Troubleshooting
Step # 2 to fix the error – Wireless – Disabled.
If the performed manipulations did not return the ability to connect to the wireless network, we will use the built-in diagnostic tool.
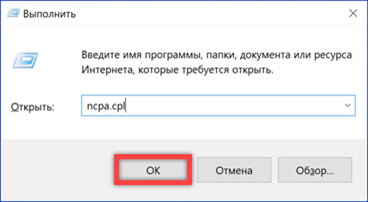
We call the 'Run' dialog box by pressing the keyboard shortcut 'Win + R'. We type in the text box 'ncpa.cpl'. Press 'OK', starting the execution of the entered command.
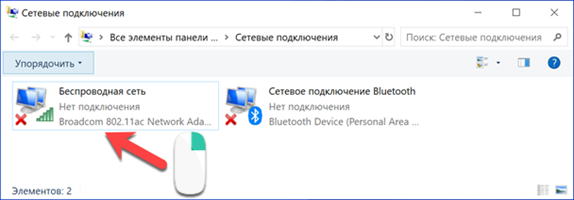
The 'Network Connections' section of the Classic Control Panel Windows opens. The presence of a wireless network icon is already a good sign. This means that the Wi-Fi adapter is recognized by the system. A red cross on it indicates a connection problem. Click on the icon with the right mouse button calling the context menu.
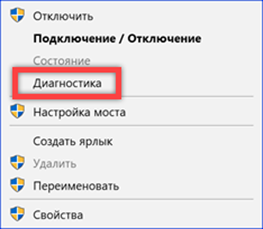
We select the item 'Diagnostics'.
A troubleshooting wizard starts and collects information about the status of network connections. We agree with the proposed option and let the system try to fix the existing equipment malfunctions on its own.
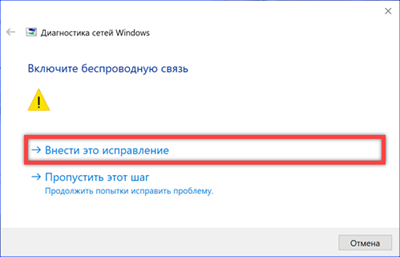
For some problems, the Diagnostic Wizard Windows can find a solution and deal with the problem. In any case, its work will end with the issuance of a report on the results.

Reinstalling the driver
Step # 3 to troubleshoot the error – Wireless – Disabled.
In the event that the above steps do not give the desired result, check the status of the wireless device drivers.
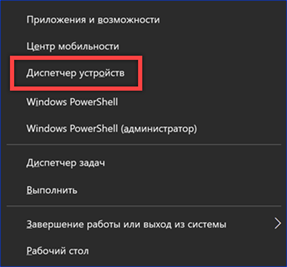
We call the extended menu of the 'Start' button using the key combination 'Win + X'. Open the item marked in the screenshot.
In the device manager, expand the contents of the section shown by the arrow. There is no single standard for naming, so we find the adapter in the name of which is mentioned 'Wireless' or '802.11'. We call the context menu for it and open the 'Properties' item.

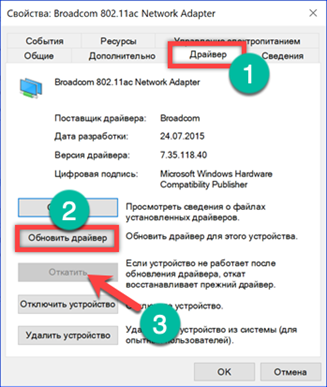
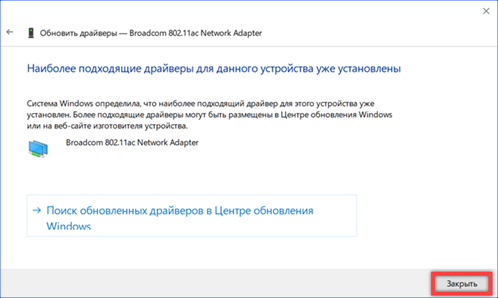
Switch to the 'Driver' tab. We use the button marked with a two to perform the update. If the version of the driver has recently changed to a new one, the option 'Rollback' shown by the arrow becomes active. If the problem with the connection appeared after the update, with its help you can return to the old, stable version of the software.
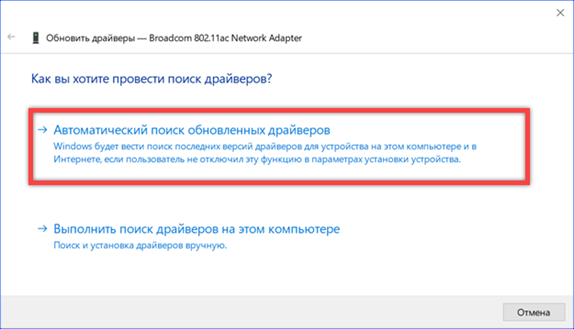
To update, select automatic search. If an additional software disc was supplied with the laptop, you must also use it. Shortcuts with the 'Fn' button and some physical switches may not work without manufacturer drivers.
If the problem was in the incorrect operation of the software, then as a result of the update it should be eliminated. To make sure that all changes have been applied in the operating system, the computer must be restarted.
Removing the adapter programmatically
Step # 4 to troubleshoot the error – Wireless – Disabled.
The lack of wireless connection may be caused by incorrect adapter settings. Since the user-defined parameters are not reset when the software is updated, replacing the driver may not produce the desired result.
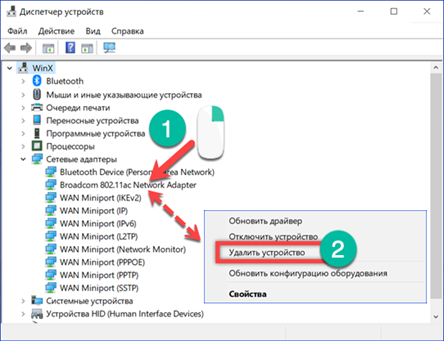
Open the device manager again. Find the network adapter and call the context menu for it. Select the item 'Remove device'.
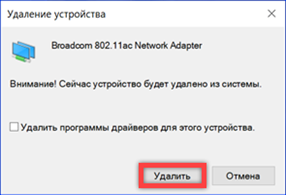
Before performing the specified action Windows will ask for confirmation. Press the button marked with a frame. Together with the device, the operating parameters set for it will be deleted.
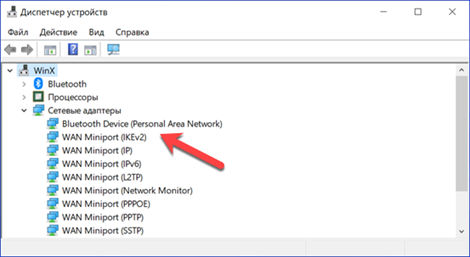
Make sure there is no more wireless module in the list of network adapters. We reboot the computer in the usual way. At the time of startup, even before the user logs in, the operating system will detect the missing device and restore it by installing the driver from the local storage. Since the adapter settings are reset to their initial values as a result of this operation, the 'Wireless Network – Disabled' error should disappear.
Checking the WLAN service
Step # 5 to troubleshoot the error – Wireless – Disabled.
The WLAN auto-configuration service is responsible for managing wireless connections, which include Wi-Fi and Bluetooth, in Windows. If it is disabled for some reason, all previous actions will have no result.
We call the Run dialog box with the keyboard shortcut Win + R. We type in the text field 'services.msc' and click 'OK'.

As a result of executing the entered command, the section of the MMC console will open, intended for managing system services. Find the WLAN auto-configuration service shown in the screenshot in the list. We call the context menu for it.

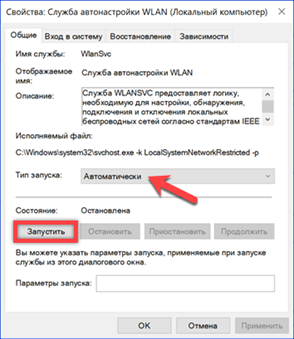
Even if the discovered service has a status of Running, it is best to restart it. After that, open the 'Properties' item and change a few parameters.

On the main tab, check the launch type. The drop-down menu indicated by the arrow should be set to 'Automatic'. If the service was stopped by changing the startup type, we start it again.
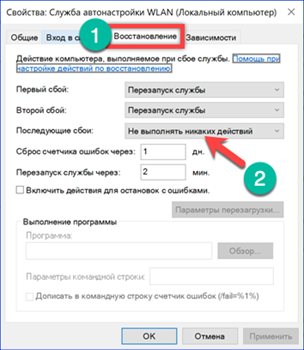
Switch to the 'Recovery' tab. The screenshot shows the default settings. We change the action of the computer performed after the second failure. Using the drop-down menu marked with an arrow, set the value 'Restart'. Thus, when a software failure occurs, the auto-tuning service will not be disabled and will wait for the computer to restart to start again. If desired, you can also change the waiting time for the automatic restart of the service, reducing it from two to one minute.
Finally
Step # 1 to troubleshoot the error – Wireless – Disabled
The methods given in this material will not only eliminate the 'Wireless network – Disabled' error that occurs in Windows 10, but also avoid its occurrence in the future.


