Installing programs in Windows 10 can sometimes fail. Some are eliminated by making changes to the settings, others with the help of additional components. In most cases, the fix is relatively easy. In this article, our experts analyze the main reasons why programs are not installed in Windows 10 and provide solutions.
Application installation rules
The presence of a store built into the operating system Microsoft Store did not greatly affect the habits of users. Many people choose to install the required software the old fashioned way.
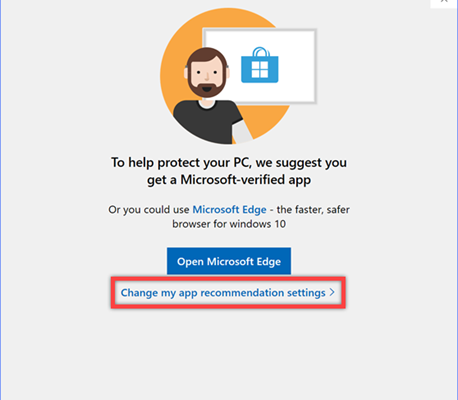
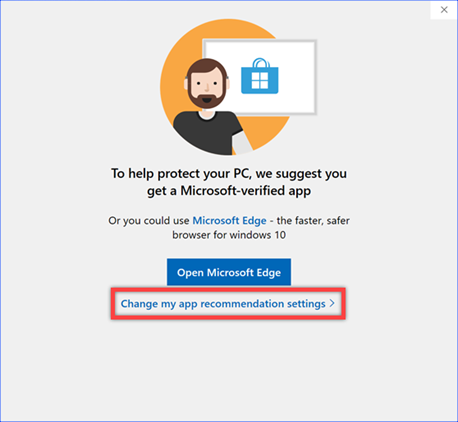
Let's try to replace the browser with the initial settings Windows 10. When the installer starts, the window shown in the screenshot will appear. The system strongly recommends using the Edge browser that replaced Internet Explorer. To proceed with the installation, click on the link highlighted in the frame.
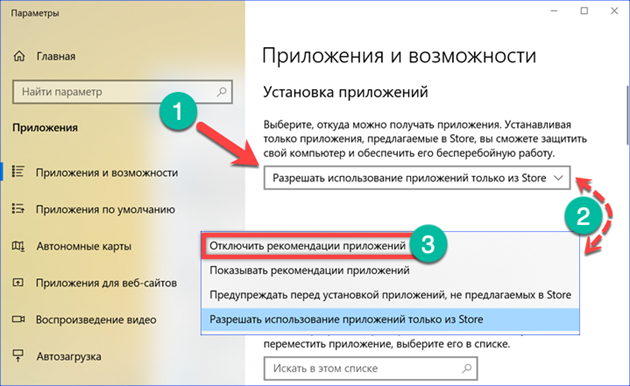
The options section Windows 'Applications and features' opens. Click on the menu indicated by the arrow to open the drop-down list. Select the item 'Disable application recommendations'. After that, you can install any applications without encountering system warnings.
Mismatch of bit depth
Microsoft is in no hurry to completely translate Windows to 64-bit architecture. The operating system still has different bit versions. For a novice user, this can be a problem when installing programs.
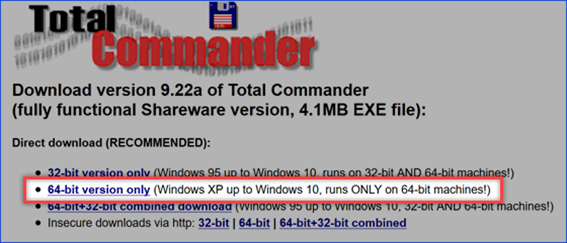
On the developer sites, you can find different options for installers. Many make dual-bit versions, containing two-bit versions at once, but there are only 64-bit versions. It is impossible to install such a program on Windows 10 with 32-bit architecture.
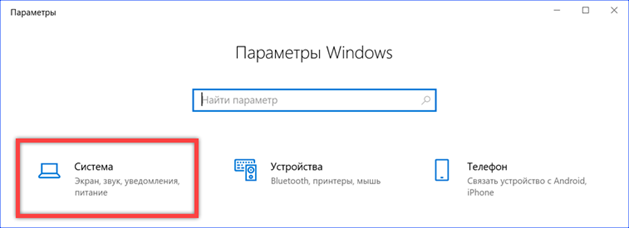
In order not to be mistaken when choosing an installer, we check which version is installed on the computer. Open the parameters Windows with the 'Win + i' keyboard shortcut. Go to the 'System' section.
The main page provides basic information about your computer. The bit depth is indicated in the area highlighted in the screenshot frame.

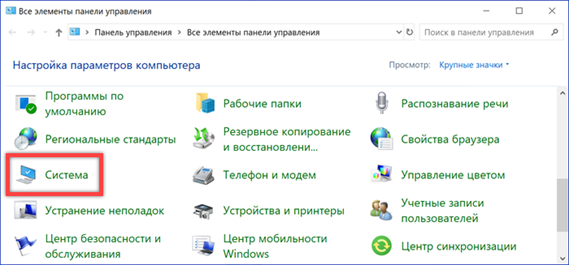
Similar information can be found in the classic control panel. Call the Run dialog box and enter 'control' into the text field. Press the 'OK' button to launch the command.

In the control panel window that opens, go to the 'System' section.
The required bit information is highlighted with a frame in the screenshot.

The same sections contain information about the installed RAM and processor frequency, which can be useful when installing games and programs that are demanding on hardware resources.
Lack of free space
Lack of free disk space can be one of the reasons why they do not want to install programs in Windows 10.
Open the OS parameters and go to the 'System' section. In the area of quick transitions, select the item 'Device memory'. In the right part of the window the hard disk utilization level is shown schematically. The screenshot shows a drive with 18.8 GB of free space left. Considering that some modern games are larger than 40 GB, it will be impossible to install them. Click on the hyperlink marked with '3' to see how much 'garbage' has accumulated in the system.

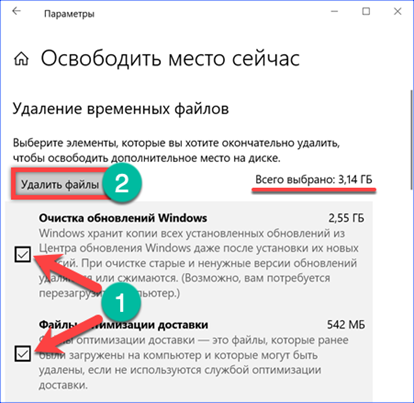
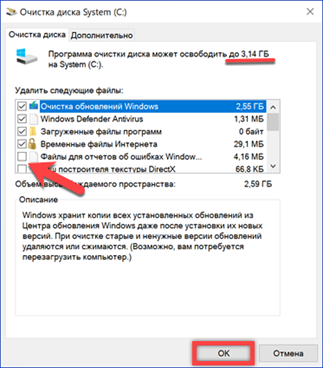
After a short counting time Windows, he offers to free 3 gigabytes from unnecessary files. To dial this number in full, you need to set the checkboxes shown by the arrows opposite all the items listed in the list. Pressing the button marked in the screenshot with the number '2', we activate the process of removing the 'garbage'.
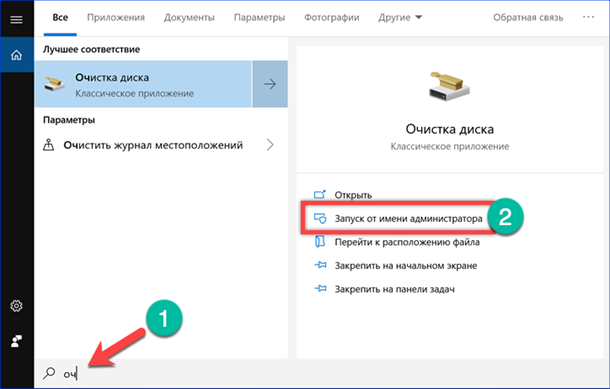
A similar result is achieved using the Disk Cleanup program from the classic operating system toolkit. We find it by searching in the 'Start' menu and launch it with administrative rights.
The actions here are similar to those performed above. In the list of files, tick off all the available items and click the 'OK' button.
Of course, 3 GB will not play a significant role when installing the game, but for Adobe Photoshop this is just enough.
Lack of development environment components
Many programs require dynamic libraries (DLL files) to work, which are part of the Visual C ++ or .NET Framework development tools.
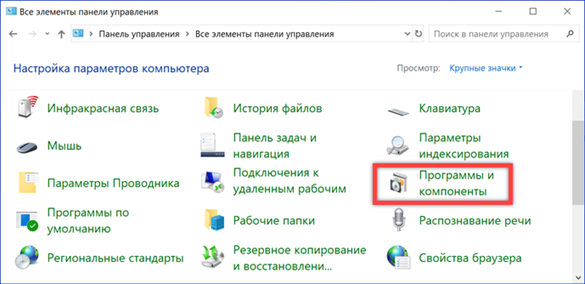
A well-written installer will automatically download and install the required components. Problems begin when using assemblies cut down by various kinds of 'craftsmen'. To check for the presence of the necessary libraries on the computer, open the classic control panel. Go to the 'Programs and Features' section.
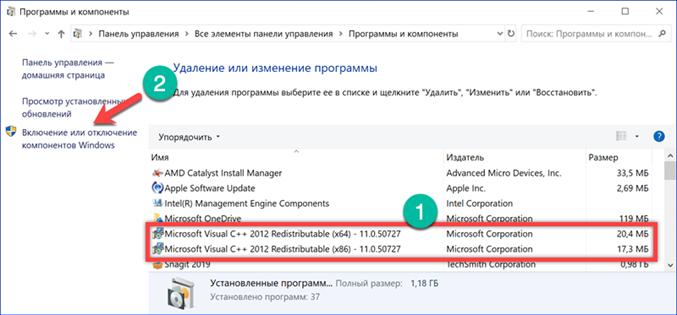
The list of software installed on the computer contains automatically downloaded packages Microsoft Visual C ++ Redistributable 2012. The screenshot shows the correct installation option in 64-bit editions Windows. For the programs to work correctly in such a system, both versions of the C ++ package are required. Open the section 'Enabling and disabling components' indicated by the arrow in the quick navigation area.
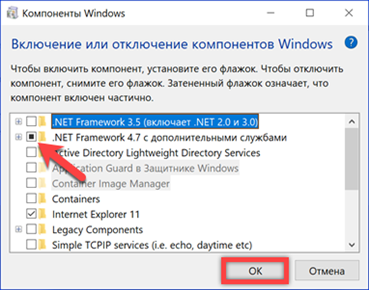
Regularly updating Windows users don't have to worry about the .NET Framework. In both builds of 2018 (1803 April Update and 1809 October Update), it is present initially, included in the necessary components of the operating system.
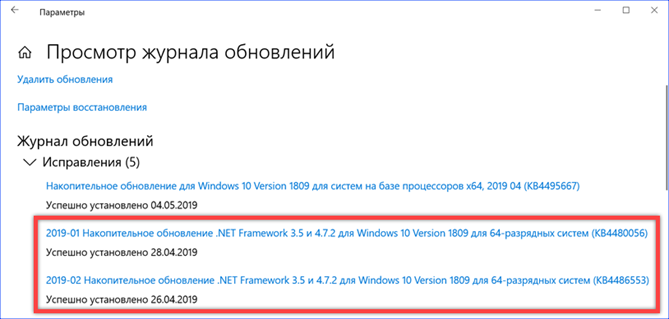
Fixes released for .NET packages are automatically installed on your computer. You can find them in the update log Windows.
Getting the latest versions
Visual C ++ Redistributable and .NET Framework packages are free redistributable. The latest versions can always be downloaded from the servers Microsoft.
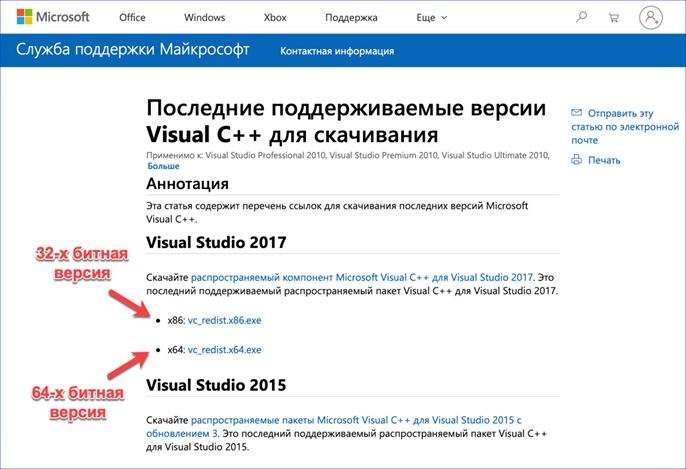
There is no need to install all versions available for download. If during installation the program itself could not determine which package it needs, it is enough to install the latest, Visual C ++ 2017. Installers for different bit depths are located on the technical support page Microsoft. Owners of the 64-bit version Windows will need to download and install both.
In no case should you uninstall automatically installed versions of Visual C ++ from previous years. Even if the latest packages are available on your computer, they may be necessary for the applications to work correctly. If necessary, you must first completely remove all existing versions, and then install them in ascending order from minor to major.
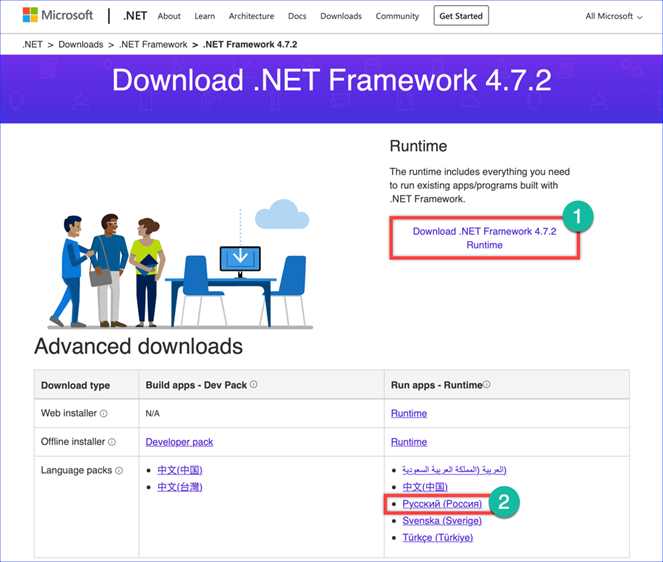
The latest .NET Framework assembly can be downloaded from its dedicated page. The online installer Runtime is downloaded separately, the link to which is indicated by the number '1' and the language pack.
Dynamic library error
If your computer finishes installing programs with a DLL error, you can repair it using the built-in Windows tools. Our experts strongly advise against downloading individual DLL files from the network for manual replacement. On the sites distributing them, with a high degree of probability, instead of the required dynamic library, you can get a viral application disguised as it.
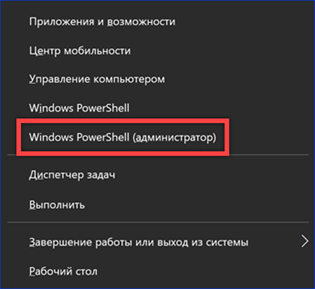
To use the tool for checking and restoring system files (SFC or System File Checker), we will use the command line. Open the extended menu of the Start button. We start the PowerShell interpreter in administrative privilege mode.
We enter the command 'sfc / scannow' and press the enter key. Windows will scan the system files, which include dynamic libraries, and find damaged automatically restore them.

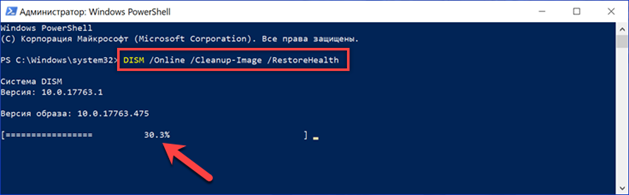
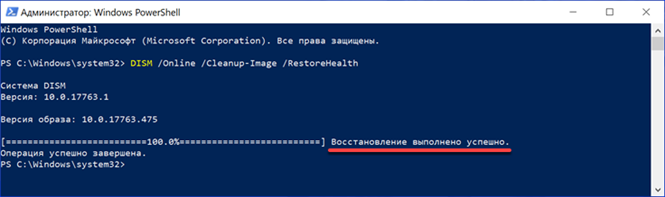
If for some reason the recovery tool does not start, use the DISM (Deployment Image Servicing and Management) toolkit. 'System Servicing, Deployment, and Image Management Windows' allows you to check your operating system recovery environment for errors. The identified problems are corrected by replacing the damaged versions of the libraries with their current versions from the Update Center. With PowerShell running in elevated mode, enter the command 'DISM / Online / Cleanup-Image / RestoreHealth'. Press the enter key and wait until the progress bar indicated by the arrow reaches 100%.
After DISM finishes working, you need to restart the computer and run the check and repair tool again.
Installation lock
Some programs can be blocked by the system, for example, because the developer does not have a digital signature Microsoft. In this case, you need to be fully confident in the advisability of installing such software. If such a need exists, and the program was obtained from a reliable source, the blocking can be temporarily disabled.
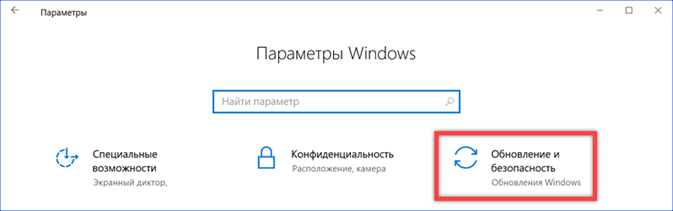
Open the system parameters and go to the section marked in the screenshot.
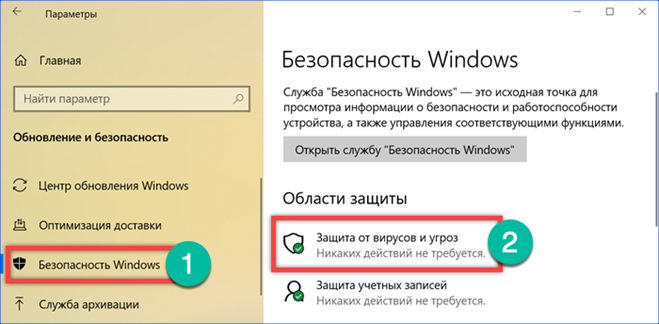
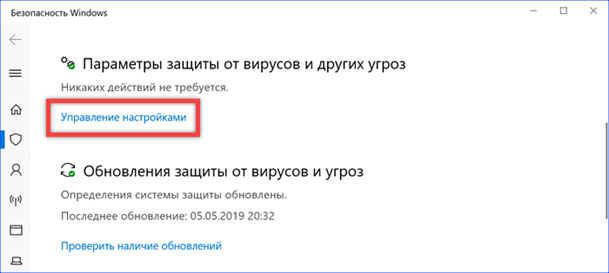
In the quick navigation area, select 'Security Windows'. We find the item 'Protection against viruses and threats' in the general list and open it.
Move to the parameters control area and click the hyperlink highlighted by the frame.
We move the switches marked with arrows to the 'Off' position, thus stopping the local and cloud protection of the computer.

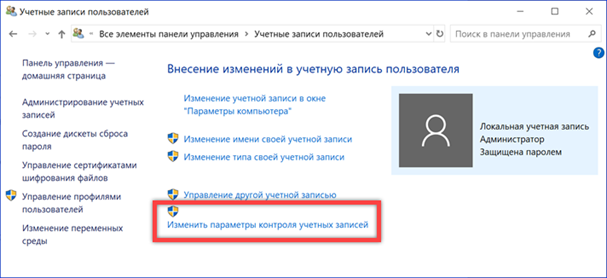
Let's go to the classic control panel. Open the section 'User accounts'.

Click on the last hyperlink in the list, which is highlighted in the screenshot.
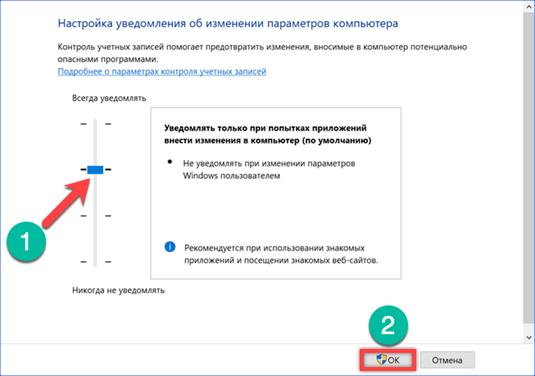
Move the slider indicated by the arrow to the lowest position. Apply the changes by clicking the 'OK' button.
Having installed the required program, we perform the described actions in reverse order. We turn on user account control and antivirus protection.
Finally
It is impossible to foresee all possible problems, but the recommendations of our experts allow you to cope with the most common and install the necessary program on your computer.


