Parental control allows adult family members to limit the time a child spends at the computer when they are away. Our experts explain how this feature works in Windows 7.
Account and control activation
The parental control function is managed from the 'Accounts' section of the control panel.
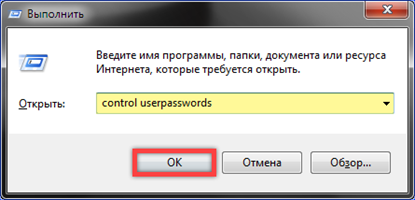
The keyboard shortcut 'Win + R' invokes the 'Run' dialog box. In the highlighted text field, type the 'control userpasswords' command to directly access the account management applet. Click the 'OK' button or the enter key on the physical PC keyboard.

The applet will open in the Manage Settings section for the current account. We make sure that you have administrative rights and password protection. Click on the link indicated in the lower left corner to go to the parental control settings block.

In the list of users, select the account for which we want to set restrictions. If necessary, use the link marked with a two to create a new one.
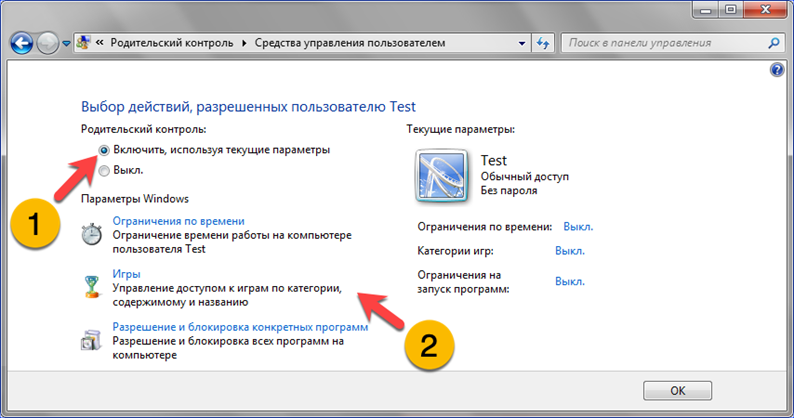
Having entered the section for managing the parameters of another user, we rearrange the radio button to the position indicated by the unit. After that, previously unavailable controls in the area marked with the number '2' will become active.
Setting control parameters
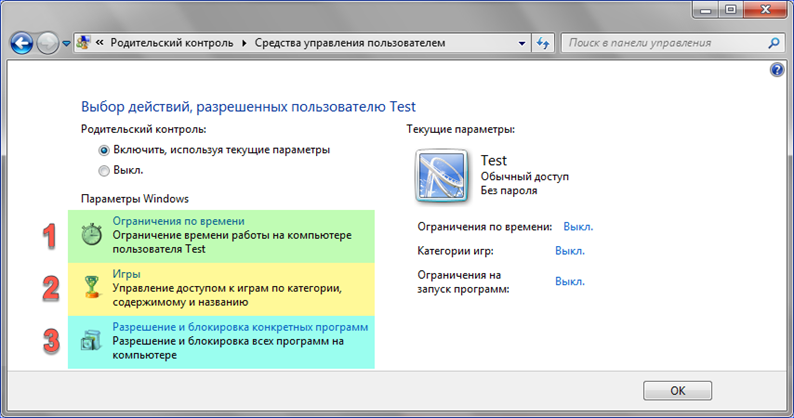
Parental control is configurable in three areas: total time the child is at the computer, access to games, and permissions to use software.
Click on the link in the area highlighted with a green marker to open the section for managing time constraints.
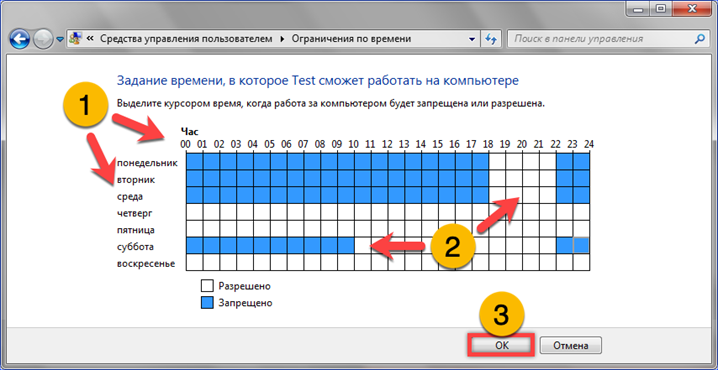
Customization is done using an interactive graph. The vertical scale contains the days of the week, while the horizontal scale divides the day into hourly periods. By moving the mouse, the parent fills in blue cells in the hours during which the child is prohibited from using the computer. The screenshot shows a partially plotted graph. PC usage time is different for weekends and weekends. Clicking on the 'OK' button completes the setup and returns back to the start page.
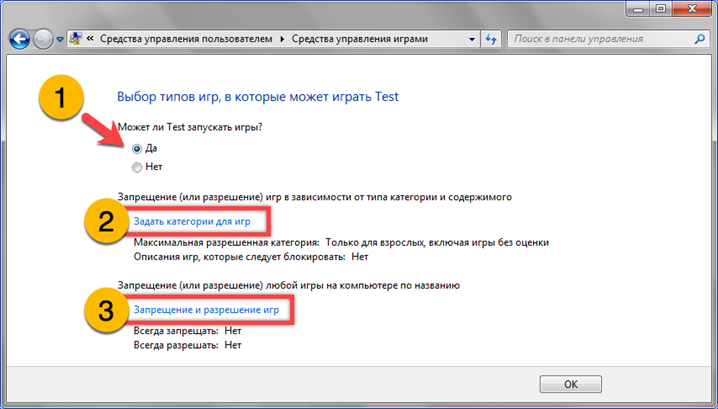
The next section is for controlling gaming applications. By default, the radio button marked with one is in the 'Yes' position. We leave it in place, allowing the child to run computer games. We use links marked with numbers '2' and '3' to customize categories or block individual applications.
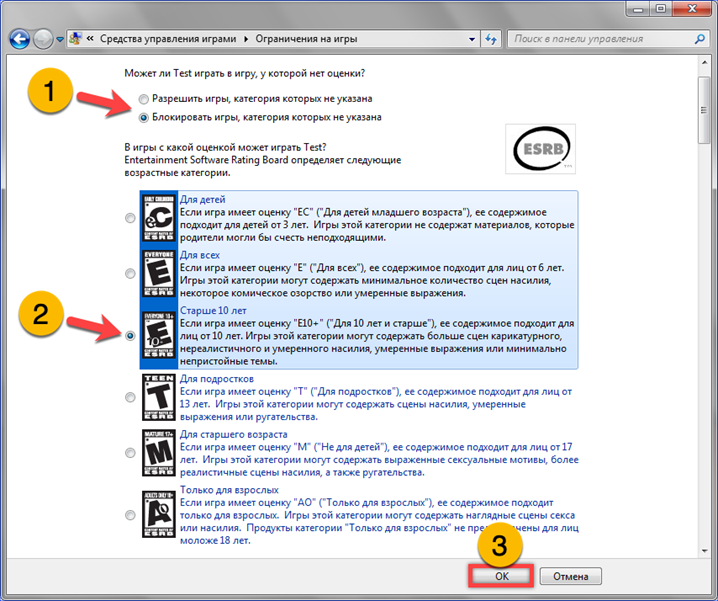
The radio button marked with one is set to the 'Allow' position by default. We transfer it as shown in the screenshot, preventing the launch of games that do not have a category. Set the next radio button to the position corresponding to the child's age. For example, our experts have established the category 'E' – for children from 10 to 13 years old. Finish work in the section by clicking on the 'OK' button.
Our experts examined game type management using the example of a standard set Windows 7. In the screenshot, the prohibited ones are marked with a red marker. This group includes all card solitaire games. Allowed games are marked with a green marker. Finish the setup by clicking 'OK'.

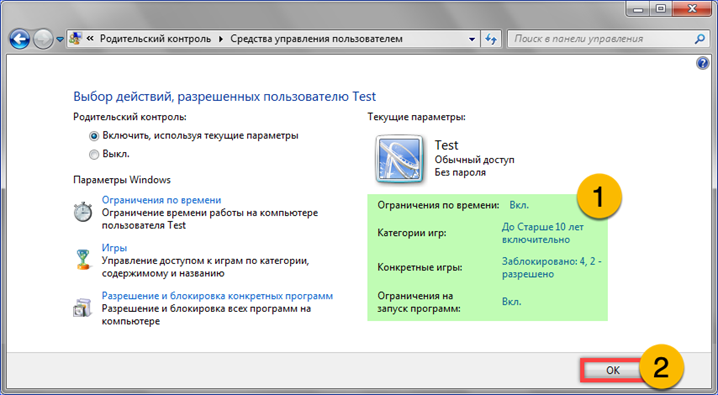
The following screenshot shows what the game applications control section looks like after making the settings. Areas that list the permissions set by the parent are shown in green bullets. Press 'OK' to proceed to the final stage.

The last section is for software management. By default, the child can use any installed programs. Move the radio button indicated by the unit to the position indicated in the screenshot. The list in the center area becomes active. The number '2' denotes the programs permitted for use by the child.

As a result of the operations performed on the main page of the profile, all the specified parameters are displayed in the area highlighted by the marker. Click 'OK' to complete the setup.
Finally
Our experts talked about setting up parental controls. Feature Windows 7 is the ability to set restrictions on a local computer that does not have an Internet connection.


