In the modern market for decorative cosmetics, there are many products for face makeup. If earlier women got by with foundation, eye shadow, mascara and blush, as well as lipstick, now there are products such as a concealer, concealer, highlighter and bronzer. And here the question already arises – how and in what sequence to apply such cosmetics to the face? And what tasks does this or that tool perform, is it necessary to use it? The journalists decided to put an end to these issues. We learned how to apply makeup on the face step by step, what function different decorative cosmetics perform, how you can change your appearance for the better with the help of make-up.
- List of cosmetics for daytime make-up
- What you need to buy to do evening makeup
- List of accessories that will help you properly apply makeup on your face
- How to properly apply daytime makeup on your face
- How to apply lipstick correctly
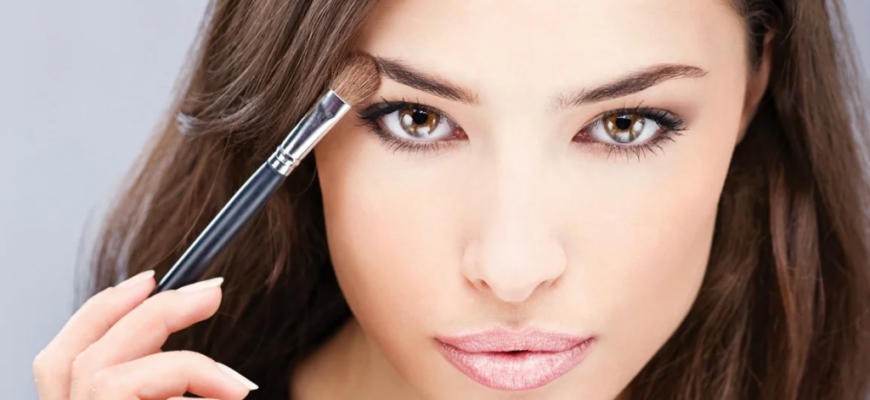
- We make expressive eyebrows
- We do eye makeup
- Taking care of dark circles under the eyes
- How to properly apply evening make-up on your face
- How to apply makeup to contour facial features
List of cosmetics for daytime make-up

In order to learn how to properly apply makeup, you need to have the necessary cosmetics on hand. We note right away that not all of them are used constantly. For example, a corrector may be needed when a pimple appears on the face. But when it disappears, the corrector can be omitted. However, this tool should be in your cosmetic bag just in case. Therefore, make-up masters always have in their arsenal a large number of cosmetics, each of which is designed to solve a particular problem. Let's list what you may need in order to apply daily makeup:
Cosmetics for the preparation of the skin:
-
Cleansing milk or foam, gel for washing. This product must be used without fail, even if you do makeup after a night's sleep and think that your skin is already clean enough. During the night, the sebaceous glands worked, so the skin needs to be cleansed.
-
Exfoliator – Use if you have dry, flaky skin. If you do not scrub or light exfoliate, you will not be able to apply makeup evenly.
-
Tonic. It will help remove the remaining cleansing milk from the face, soften the skin and tighten pores. If you do not have a tonic or are out of it, wash yourself with cold water or wipe your skin with an ice cube made from drinking water or an aqueous infusion of chamomile.
-
Moisturizer or any other cream for daily skin care. It is desirable that the cream be UV-protected. Such a product should be applied under makeup both in summer and in winter, since in the cold season, UV rays no less aggressively affect the epidermis.
-
Makeup primer. This product is the base that binds the skin and the layers of cosmetics, makes the makeup resistant throughout the day.
-
Corrector. This remedy is used if there are any aesthetic defects on the skin of the face that it is desirable to mask. The concealer has high overlapping properties and a dense texture, therefore it camouflages even highly visible blemishes such as acne and scars. The corrector can have a beige (flesh) tint, such a tool is suitable for visual masking of minor violations. Green, pink, purple, peach color correctors are designed to camouflage red acne, bruises under the eyes, vascular mesh and other 'color' defects on the skin of the face. To understand what kind of corrector you need, look at the color wheel – green is opposite red, which means it can overlap it. Therefore, a green corrector is used to mask red acne. Corrective remedies for other defects are found in a similar way.
-
Tone cream. The shade of this product is of great importance. For women with porcelain skin and light hair, very light shades of foundation, such as 'ivory', 'ivory', are suitable. A darker product will be needed for women with fair skin and brown, light brown hair. The 'light to medium' and 'medium' shades are suitable for women with standard skin tone and dark hair. Girls with an Asian type of appearance and with even darker skin use a foundation of the darkest shades.
-
Concealer (+ bronzer). This tool is useful if aesthetic defects are still visible on the face after applying the foundation. It also helps to sculpt the face, that is, to visually adjust the shape and size of some facial features. With the help of a concealer, which is a little lighter than foundation, and a bronzer, you can visually narrow a wide nose, raise a low forehead, make higher cheekbones, plump lips, etc. Instead of concealer, you can use a highlighter or any other light product. Instead of a bronzer, you can use any cosmetics of a dark shade, for example, light chocolate shadows.
-
Powder. This product is not required to apply makeup. But it makes the make-up complete. However, if the weather is hot outside, it will be difficult to 'wear' so many layers of makeup on your face. At the same time, in the summer, a greasy shine appears on the face more often, and it will be quite useful to powder it. Therefore, powder is applied at will and depending on the circumstances.
-
Blush. They also do not have to be used in order to apply daily makeup on the face. If you want to give the apples of your cheeks a slight pinkish tint, blush should be in your cosmetic bag. If you prefer aristocratic pallor of the face, this type of cosmetics can be skipped.
-
Means for shaping and correcting eyebrows. If you have no problems with this area of the face, you will not need cosmetics. If the hairs do not have a sufficiently saturated color, if the eyebrows are sparse, thin, you may need such products: eye shadow (or mascara, pencil, eyeliner), a fixative spray or eyebrow wax.
-
Cosmetics needed to apply eye makeup. In the case of a daily make-up, you will need soft shadows of nude, pastel, delicate shades that match your eye color and the general color type of your appearance. In addition to eyeshadow, you may need a pencil or eyeliner in gray, brown or black; mascara of the same shade.
-
A lipstick or lip gloss suitable for daytime use. Optionally, you can also buy a lip liner to match the lipstick.
These are the main types of decorative cosmetics, without which it is difficult to properly apply makeup on the face. In the case of eyeshadows, eyeliners and lipstick, you may need different shades of these products, because making the same make-up every day is boring, it is better to alternate colors, creating a fresh look every time.
What you need to buy to do evening makeup

Sooner or later, every girl needs to learn how to apply an evening make-up, which differs from the day one in that it is performed in a brighter and bolder technique. Therefore, your cosmetic bag should contain decorative cosmetics for just such a case:
-
Eyeshadow for rich, dark, juicy shades. For evening makeup, all glitter shadows are also suitable – pearlescent, satin, frost, etc.
-
Bright colored eyeliner, kayal pencil – these tools will allow you to focus on the eyes.
-
Lipsticks in intense colors. For example, during the day it will not always be appropriate to use burgundy or Marsala lipstick, bright red. But for an evening, festive make-up, these options are perfect if the emphasis is on the lips.
-
Mascara-volumizing or with a 3D effect, increasing the volume and length of eyelashes, curling. It is in festive make-up that this decorative cosmetics product is perfectly appropriate. You can also buy several colored mascaras – blue, green, if these shades suit your eye color.
-
Highlighter with a soft pearlescent shine. For daily makeup, you need to choose this product with a matte finish, and in order to apply an evening make-up, a shimmer preparation is suitable.
List of accessories that will help you properly apply makeup on your face

In order to properly apply cosmetics and correct the result, you will need a standard set of accessories and aids:
-
Mirror, including a small magnifying mirror.
-
Cotton pads and cotton swabs, paper napkins.
-
Make-up remover, such as micellar water or two-phase liquid. If you are using waterproof makeup, the makeup remover must be of the correct type.
-
Brushes of different shapes, sizes and volumes.
-
Sponges and applicators.
-
Pencil sharpener. The best option is a double sharpener that can handle pencils with different body diameters.
-
Eyelash curler. For daytime makeup, tweezers are used on clean, mascara-free lashes to achieve a natural result. If you need to apply a festive make-up, eyelashes covered with 1-2 layers of mascara are curled with tweezers.
-
Tweezers for eyebrow shaping.
-
Manicure scissors or a special trimmer to correct the length of the eyebrow hairs.
These are basic accessories and materials that you will need every day. Store them in one place so they are always at hand.
How to properly apply daytime makeup on your face

Basic rules to help you apply makeup correctly:
-
Makeup should be applied in daylight. This is the only way you can be sure that your makeup will look natural on your face. Some girls paint in the bathroom or in a poorly lit room, and when they go outside, they find that in daylight the foundation layer looks too thick or there is an excess of powder or blush on the face. To avoid this, you need to apply makeup on your face near a window or under a fluorescent lamp.
-
You need to apply cosmetics after you have already dressed. If you first put on makeup, and then put on, for example, a jacket with a narrow neck, cosmetics may not remain on the face, but on the clothes.
-
First, light shades of cosmetics are applied to the face, then dark ones. For example, if you are using beige and chocolate eyeshadows, first paint over the lids with a light shade, and then apply a layer of dark pigments.
-
All borders, where some shades pass into others, should be shaded. The transitions should be smooth and natural. And at the same time, the tones should not merge into one continuous spot, as it looks untidy.
How to properly apply makeup on your face – sequence of actions:
-
We cleanse, scrub, tone, moisturize the skin of the face. Give the cream time to absorb, especially if it is oily. After 10-15 minutes, remove the remnants of the product from the face with a paper napkin.
-
Apply a primer to the face, spreading the product over the surface of the skin along the massage lines. We move from the center to the extreme zones, from the forehead to the chin. We do not use the pads of the fingers, but a special triangular sponge or a dense synthetic brush. The primer will not be superfluous to apply on both eyelids and lips. Thus, it will be possible to even out the tone and relief of the skin in these areas, as well as provide increased makeup durability.
-
We use a corrector if necessary. We apply it pointwise – precisely on the problem areas, slightly shade the borders of the pigment. If a large area needs correction, for example a large area of skin on the forehead or cheeks, it is better to use a mower (before and / or after foundation).
-
Apply the foundation along the massage lines, as well as the primer. Do not forget to touch the areas adjacent to the face – the upper part of the neck (throat), earlobes. Along the hairline, the foundation should be applied very carefully, literally driving it 2-3 millimeters beyond the border between the skin of the face and scalp. This will help us avoid masking and dissonance between skin tones in different areas.
-
Apply concealer if needed. Sculpt the face with a highlighter and bronzer (how to do it correctly will be described below).
-
At this stage, we are finished with the face. At the very end, you just need to powder it and make a few strokes on the apples of the cheeks with a brush dipped in blush.
-
But the makeup is not over yet, you need to pay attention to the eyebrows, eyes and lips. Let's look at how to apply makeup to these areas of the face. Experts have provided the readers of our online edition with step-by-step instructions.
How to apply lipstick correctly

If you want to learn how to properly apply makeup on your face, then you should definitely master the lip makeup technique. Although, if you don't like the feel of lipstick on your lips, you may simply not paint this area. But most girls still use lipstick or gloss, so our experts tell you how to do it correctly:
-
Lips should be treated with a light scrub to even out their relief and stimulate blood flow to this area. This is done before you start applying makeup on your face.
-
With the help of an egg-shaped sponge, the lips are covered with a primer (in extreme cases, with foundation or powder). The primer should be 'hammered' into the skin with light patting movements so that the cosmetic product penetrates into all the small folds of the skin of the lips.
-
If you plan to outline the lip contour with a pencil, you need to use it at this stage. Some fashionistas, in order to visually increase the volume of the lips, do the contour not along the border of the lips, but slightly going beyond it. Indeed, this technique can make the sponge look fuller. But professional makeup artists do not recommend using a contour pencil in this way. Every outsider will notice that you have painted over the area beyond the natural borders of the lips. And it looks unnatural. It is better to apply contouring techniques that are no less effective in visually increasing the volume of the lips, and the result looks natural. Therefore, a contour pencil is used only along the contour of the lips. You need to start drawing from the middle, moving to the edges, up to those points where the cut of the upper and lower lips begins. With a contour pencil, you can make the peaks of the upper lip more pointed, this minor intervention in the anatomical features will not be noticeable to others, but will help make the lips more sculpted. You can also paint over a small area of the inner lips with a pencil. This is done in order to increase the durability of the lipstick, which can gradually 'eat up' during a conversation or in the process of eating.
-
After the contour pencil, you can use lipstick, it is applied with an applicator or brush inside the contour and over it. After 2-3 minutes, the first layer should be blotted with a paper towel, then powdered, after which the final layer is applied.
-
To add plumpness to the lips, take any light creamy product (foundation, concealer, concealer, highlighter, shadow), type it on a brush, put a dot in the middle of the lips at the place of their joint. Then join your lips several times in a characteristic movement, as if you were distributing lipstick. A light spot, well blended over lipstick, will give your lips extra volume.
-
If you use gloss to paint your lips, then you won't need a contour pencil. Just apply the product to your lips, distribute it evenly over the surface, nothing else is needed.
We make expressive eyebrows

It is impossible to apply makeup without correcting the eyebrows, as the expression on the face literally depends on it. Even if your eyebrows are naturally beautifully shaped and thick enough, you still have to work on them.
It is necessary to correct the area of the brow arches even before applying the make-up on the face. First of all, you need to decide on the form. We take the natural outlines of arcs as a basis. We pluck out those hairs that are knocked out of the total mass with tweezers. In this case, you need to remove only those elements that grow under the lower border of the arcs, between them (on the bridge of the nose) and at the extreme points. You also need to form a soft bend in the lines. The point where the brow arches curve is the point above the pupil of the eye. The optimal start of the eyebrow is above the inner corner of the eye. The eyebrow should end where the conditional line drawn from the wing of the nose to the outer corner of the eye and further to the temple crosses the brow arch.
When the shape is corrected, you need to shorten the hairs. The fact is that during the day you imperceptibly touch your eyebrows with your hands, long hairs can wrinkle, get out of the general mass and spoil the image. To prevent this from happening, you need to give the eyebrow hairs the optimal length. For this, in most cases, a trimmer with a restrictor attachment is used, which does not allow cutting off excess. If you do not have such a trimmer yet, use nail scissors and a small flat comb with small, tightly spaced teeth for the 'haircut'. Comb your eyebrows by moving the comb from the bottom up, keeping it horizontal. All hairs that are so long that they go beyond the boundaries of the shape you defined must be carefully shortened with scissors. Then we repeat the procedure, but comb the hairs not up, but down.
After correcting the shape and length, the hairs need to be combed in the direction of their growth, that is, right and up for the right eyebrow, left and up for the left. A special eyebrow brush or a brush from old, used mascara, previously cleaned of dye residues, copes with this task very well.
Now, if necessary, you can slightly emphasize the shape of the eyebrows, make it more graphic. To do this, you need to take a pencil in color close to the natural shade of the eyebrow hairs or one tone lighter than the hair on the head (for blondes – one tone darker). With a pencil, you need to carefully mark the lower edge of the eyebrow arches, as well as the upper one, stepping back from the base 3-5 millimeters. With the same pencil, you need to shade the surface of the skin inside the shape of the brow arches. The strokes should mimic natural hairs as much as possible in thickness, length and direction of 'growth'. The shading intensity gradually increases from the base to the tip of the eyebrow. In order to lightly color the eyebrows, you can use special mascara or shadows. For daytime makeup, the latter option is more suitable.
To keep the shape of the eyebrows beautiful throughout the day, and the paint does not smear, you can use a special fixing gel or spray, as well as wax-based products.
A highlighter or any light product will help to emphasize the grace of the shape of the eyebrow arches and slightly raise them. It must be applied to the area under the lower line of growth of the arcs and shaded well.
We do eye makeup
It is necessary to apply cosmetics on the eyes, more precisely on the eyelids, after the work has been done on the face and eyebrows. Eye makeup can be done in different techniques, here you need to build on both the anatomy and the effect you want to get, and the presence or absence of certain cosmetics in your arsenal.
Our consultants recommend that you start with a few of the most basic eye makeup techniques. Having mastered them, you can move on to more complex techniques that will help emphasize all the positive aspects of your appearance.
The first technique that is optimal for daytime makeup is nude. The cosmetic colors recommended by our experts are universal. They are suitable for women with different types of looks. You can use shadows, pencil and mascara in other shades as part of this technique if you think they suit you better.

How to properly apply makeup on your face using the nude technique:
-
All the necessary cosmetics are applied to the face, starting with a primer and ending with a foundation with a light, translucent texture. We make the eyebrows dim, they should look as natural as possible.
-
It is assumed that the upper eyelids are already primed, so we apply a light beige or nude shade to the entire movable eyelid.
-
We take a light brown pencil, draw the space between the eyelashes on the upper eyelid. Underline the eyelid in the same way.
-
We take shadows of a light brown shade, apply them along the lash line on the upper eyelid. Having reached the outer corner of the eye, we go to the fold above the movable eyelid. We paint over it 5-10 millimeters towards the inner corner of the eye. Shade well.
-
We take the same brown pencil, draw an arrow over the shadows on the upper eyelid. The tip of the arrow extends 2–3 millimeters beyond the upper eyelid.
-
With brown or black ink, lightly touch the upper and (optionally) lower eyelashes. Instead of mascara, you can curl your eyelashes with tweezers. The effect will be much the same.
-
After you have made up your eyes, you can apply makeup on your cheeks – we simulate the lightest natural blush. And also on the lips – you can use a transparent or nude gloss, matte lipstick in pastel shades.
The second technique will allow for a brighter, but still discreet enough eye makeup for a daytime look. Shades of eyeshadow and other make-up are suitable for almost every woman, but they can be replaced with other suitable colors.

How to apply eye makeup to make them stand out:
-
The surface of the eyelids is prepared and primed applied, so we can immediately use light shadows with a minimal pearlescent sheen. The cosmetic product is applied to the entire surface of the static and mobile eyelid from the lash line to the eyebrows, from the inner corner of the eye to the outer.
-
We take a black or gray pencil, departing from the outer corner of the eyelid 2-3 millimeters, we begin to draw a rounded line towards the tip of the eyebrow, and then above the crease of the eyelid. We should get the letter 'C' (on the right eye 'C', mirrored), that is, an ellipse (oval) shape that lies on its side. The rounded side of the figure is above the outer zone of the upper eyelid.
-
We take dark shadows – brown, gray, dark beige, begin to shade the pigments beyond the border of the ellipse. It turns out that the area of the moving eyelid is covered with light pearlescent shadows, and the outer corner of the eye is painted over with a darker pigment.
-
Draw a thin neat arrow on the upper eyelid with a pencil, touch the lower one only with dark shadows.
-
Apply one layer of mascara to the upper and lower lashes.
It is not difficult to apply such makeup on the eyes, but experts recommend practicing several times before going out to fill your hand.
Taking care of dark circles under the eyes

The eyebrows are not the only area on the face that attracts the eye. Circles under the eyes can ruin the look as irreversibly as unkempt eyebrows. Therefore, the correction of this zone is a mandatory step, without which it makes no sense to apply makeup on the face.
It is appropriate to eliminate dark circles and bags under the lower eyelids at the very initial stage of makeup. We have highlighted this procedure in a separate subheading of the article, as it is related to eye makeup. But the tips listed below should be applied at the stage of preparing the skin for applying cosmetics.
How to eliminate, or effectively mask aesthetic defects of the skin under the lower eyelids:
-
Apply a cooling mask to the under eye area before applying makeup. To do this, take two bags of black, or preferably green tea, brew as usual. Squeeze the bags lightly from the liquid and place in the refrigerator for 30-60 minutes. Apply chilled tea bags to under eye skin for 15 to 20 minutes.
-
Rinse your face, pat dry with a paper towel, and apply eye serum.
-
15 minutes after applying the serum, take a concealer or concealer – any highlighting agent, and draw an inverted triangle (point down) from the lower eyelids to the upper border of the cheeks. Blend the pigments thoroughly.
-
If the dark circles are still very visible, use a yellow, orange, apricot, or salmon shade corrector. This concealer will cover the purple-blue color of the circles under the eyes.
-
After that, you can continue to apply makeup on your face according to the standard scheme – primer, foundation, etc. The bruises under the lower eyelids, if they do not disappear completely, will not be so noticeable to others.
How to properly apply evening make-up on your face

Applying evening make-up to your face is no more difficult than applying daytime. You just need to use cosmetics in richer shades, for example, brighter lipstick or darker eye shadow. The difference between an evening make-up and a daily one lies in the following aspects:
-
Makeup should be in perfect harmony with accessories, clothes and shoes color. If in the daytime make-up such contradictions arise infrequently, then in the evening make-up this issue should be given increased attention. The image should be harmonious, not evoke a feeling of theatricality, excessive drama, glamor and puppetry.
-
Emphasis can be placed on both the eyes and lips. Or on both areas of the face at the same time. Evening bow assumes that you opt for rich gradients, the main thing is not to overdo it. The perfect example of a discreet make-up with an accent on the eyes and lips at the same time – the images of Marilyn Monroe, Dita Von Teese and generally a retro-style make-up. In front of our eyes – gorgeous arrows, on the lips – red lipstick, but the woman's appearance looks quite restrained, albeit in a festive way.
-
Makeup should be applied under artificial lighting. At a gala evening in nature or in a restaurant, there will certainly be a dim light that creates a comfortable atmosphere. Accordingly, you should evaluate how the make-up will look in this light, while applying makeup on your face.
The sequence of evening make-up is standard – we correct the eyebrows; scrub lips and facial skin; apply a primer, corrector, tonal agent (powder, blush); paint eyes; we carry out face contouring; paint lips. If at some stage you make a mistake, do not rush to wash off all the cosmetics, just use a light corrector or walk over the unsuccessfully painted area with a cotton swab moistened with micellar water.
How to apply makeup to contour facial features

One of the main tasks of makeup is to present attractive features in a favorable light and divert the attention of outsiders from the flaws that often exist only in the imagination of a woman. And, nevertheless, a correctly executed make-up can visually correct facial features. How does this happen? Due to the effect of light and shadow. What is darkened loses volume, length, becomes less noticeable. And those features and areas of the face that are highlighted, attract attention, attract the eye. This means that if you apply cosmetics of a certain shade to certain areas of the face, you can visually change your appearance. The main rule is to apply funds in a thin layer and shade them well, erasing the boundaries of the transition of a light shade to a dark one.
How to correct facial features using the contouring technique:
-
Wide, flattened nose. In this case, you need to divert attention from the lateral zones of the nose and accentuate the back. To do this, after the foundation is applied, you need to take any cosmetic product of a light shade, ideally a highlighter, apply it in the center of the nose along the entire length. And on the sides, apply a cosmetic product in a dark shade, for example, matte bronzer or dark beige eyeshadow.
-
Long nose. To visually shorten the nose, apply a speck of dark pigment to the tip and blend.
-
Inexpressive cheekbones. You can visually raise this area of the face and make the cheekbones more graphic if you apply a highlighter directly under the eye sockets. That is, on the upper region of the apples of the cheeks. Then you need to draw in your cheeks, making the lips a 'bow' and where the dimples have appeared, use an opaque agent. It needs to be shaded diagonally – from the hollow towards the earlobe.
-
Low, overhanging forehead. Go with a highlighter along the border of hair growth on the head in the forehead area, as well as in the center of the forehead, drawing a conditional inverted triangle with a light pigment, the lower vertex of which is located between the base of the eyebrows. Remember to blend your makeup.
-
Too high, flat forehead. In this case, we pass along the hairline with a dark pigment – a bronzer. And the middle of the forehead, to give it volume, is also treated with a highlighter.
-
Narrow eyes. This problem can be dealt with by applying light pigment to the upper eyelid along the lash line, as well as to the lower eyelid, painting over the mucous membrane.
-
Eyes that are set close to each other. To visually 'open' the eyes, apply a highlighter with a slight shimmering effect to the inner corners of the eyelids, on the bridge of the nose. Try to avoid dark arrows in your makeup, which originate in the inner corners of the eyes.
-
Widely spaced eyes. In this case, the inner corners of the eyelids and the bridge of the nose can be slightly darkened. And the arrows need to start drawing as close to the center of the face as possible.
-
Insufficiently plump or expressionless lips. The same highlighter that is applied above and below the lower lip will help to visually enlarge the lips.
-
Heavy chin or square jaw. Highlight the middle of the chin and apply dark pigment on the sides.
-
Plump cheeks. Where there is unwanted volume, apply bronzer to the skin. Apply highlighter to prominent areas.
By analogy with the above methods, you can correct any features of your appearance that do not suit you. The main thing is to follow the principles of contouring, taking into account the properties of light and shadow.


