A beautiful neat manicure is a dream and pride of any modern woman. But what if you don't have time to go to a beauty salon or a nail bar? Or is your master busy, on sick leave, on vacation? Nail art experts told reporters that they recommend that every woman learn how to do a manicure on her own. It is enough to be able to carry out a simple hygienic treatment of nails in order for them to always look neat. Having mastered this technique, you can easily do decorative manicure, that is, cover your nails with varnish, using various fashionable techniques and keeping up with fashion trends.
- The key to a quality manicure is the availability of the necessary tools and accessories
- How to do a regular trim manicure at home
- How to do an unedged manicure at home
- How to choose and execute the shape of the marigold
- How to paint marigolds to get an even and beautiful coating
- How to apply a solid color varnish of a bright or dark color to your nails
- How to do a manicure at home using a solid nude or pastel varnish
- How to make French nail art
- How to do a neat quartz manicure at home
- How to make a neat moon manicure for yourself at home
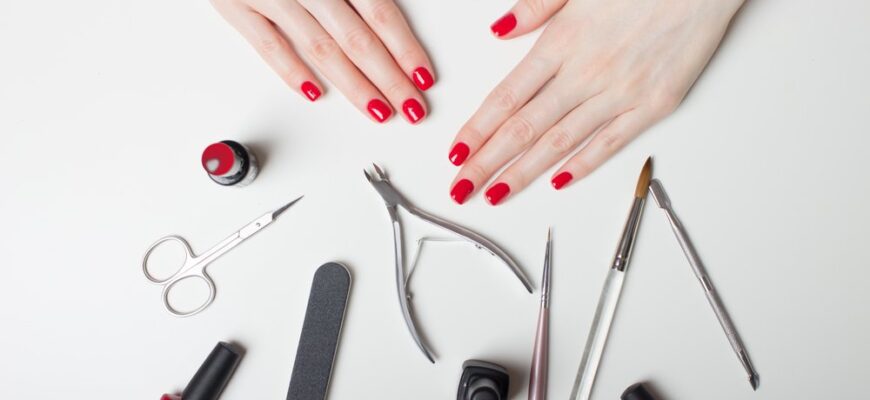
The key to a quality manicure is the availability of the necessary tools and accessories

If you are going to do a manicure at home, be sure to buy a set of tools. It is desirable that these are professional tools that are used by nail art masters in beauty salons. They will last much longer and provide a high speed of the procedure. Our experts recommend paying attention to the products of the old German company 'Solinger'.
List of necessary devices for manicure at home:
-
Cuticle Tweezers. You can find these tools on the market with different blade sizes. The best universal option is 5 millimeters. If you are used to removing cuticles with nail scissors, this is fine. But tweezers work more efficiently as they have beveled blades that cut off more skin. As a result, the manicure lasts longer than after scissoring.
-
Cuticle pusher. This device is also called a 'pusher'. It is a stick, at one end of which there is a miniature scapula, and the other tip is pointed.
-
Manicure scissors or clipper for adjusting the length of the nail plate. Buy the tool that is more convenient for you to use. But nail art masters are still advised to get used to working with clippers, which are of two types – for cutting nails on fingers and toes. Clippers, unlike nail scissors, cut off the edge of the nail plate at the correct angle in one motion. Using this tool, you are less likely to make a mistake and cut off excess, shortening the nail more than you would like. In addition, nail scissors injure nails much more than clipper blades.
Nail files and polishers. When choosing, pay attention to the degree of abrasiveness of the coating of the tool. Grit is indicated on the surface of the nail file, and if you do not see such a marking when buying, then this is a low-quality product that can contribute to the fact that the nail begins to crumble and exfoliate. There are these types of nail files and polishers:
-
From 80 to 180 grit – files are too hard for natural nails, they are used for extended ones.
-
From 180 to 240 grit – files of different hardness, suitable for filing natural nail plates.
-
From 240 to 500 grit – the tool is designed for polishing nails.
-
From 1000 grit and more – the device is designed for the final polishing of the nail plate.
File for European unedged manicure at home. It has a characteristic square or rectangular shape and roundness at one end.
A ceramic hoof manicure that will also come in handy if you plan on getting an unedged manicure.
Some novice home manicurists use a tool such as a fork to remove cuticles. It can be found commercially and is not expensive. But experts categorically do not recommend using such a device at home. In most cases, its blades injure not only the skin, soft tissues, but also the nail plate at the base, and also cause bleeding. The most difficult complication after the use of the 'fork' is a violation of the growth of the nail – for the rest of its life the nail plate will grow crookedly.
All manicure tools must be disinfected after each session at home. Therefore, you can buy alcohol (solution 70-90%) and a disinfectant, for example, Chlorhexidine. In pharmacies and cosmetics stores, you can find special products for disinfecting metal devices and treating hands.

To sterilize tools after work, you can use methods suitable for home conditions:
-
Metal appliances are placed in a specially designated container, which must be placed in an oven preheated to 250 degrees for 15-20 minutes. If during the procedure the devices come into contact with blood, they are soaked in Chlorhexidine and wiped with alcohol before heating.
-
Nail files, orange sticks and other reusable accessories are wiped with Chlorhexidine and alcohol. If objects have come into contact with blood, they must not only be wiped, but pre-soaked for 10 minutes in a disinfectant.
Sterilization of devices and accessories at home is a guarantee that pathogenic microorganisms that can infect hand tissues during the next manicure procedure will not multiply on their surface.
If you intend to do a manicure with gel polish, you will need a special lamp to polymerize (solidify) the material.
In addition to tools, you need to prepare the following tools and accessories:
-
Large container, preferably made of ceramic, as this material keeps the water temperature well. The volume of the container should be such that a hand can freely fit in it.
-
Soft terry hand towel or paper towels.
-
A special roller, on which it is convenient to put the finger and brush to be processed.
-
Cotton swabs and discs or lint-free wipes.
-
Decorative varnish of the desired color or a set of coatings that are used in different manicure techniques. Buy beige, pale pink, white varnishes for starters – they are often used in modern decorative designs.
-
Special liquid for removing varnishes.
-
Soft orange sticks (needed to push the cuticle skin back).
-
Wooden toothpicks for different styles of manicure (can be replaced with a simple sewing needle).
-
A base coat for marigolds, if you do not plan to use colored decor after a manicure.
-
Cuticle removers (alkaline, acidic), as well as a preparation for preventing cuticle growth based on fruit oil.
-
Means for massage and care of the cuticle.
-
Medical glue BF-6 for treating wounds – in case you damage the tissue during the edging hygienic manicure. This is an excellent tool that disinfects the damaged area and fixes tissues like a plaster.
-
Hand cream based on fruit oils. The composition should not contain mineral oil, since this refined product is not useful for hand tissues. It also does not make sense to use sunflower or olive oil instead of cream. Such products are good for the skin, but not for the marigolds, as they have large molecules that do not pass into the cuticle.
How to do a regular trim manicure at home

The simplest manicure at home is hygienic. That is, you just put your nails in order, without using decorative coatings like gel polish. Hygienic manicure at home can be of two types – edged and unedged. It means that in the first case, cutting tools are used, and in the second, not.
The sequence for performing a trim manicure at home:
-
Remove old decorative coating, if present.
-
Wash your hands with soap and water, and disinfect them, dry the nails thoroughly.
Shorten the nails to the desired length as well as the desired shape. Rules for working with a nail file and polisher:
-
The nails should be dry. During the manicure procedure, the nail plates can absorb a lot of liquid. As a result, they become very flexible and, as it were, stretch after the file, which does not allow making a high-quality cut. If you use a nail file on wet nails, they will 'loosen up' and may break.
-
It is impossible to file the marigolds, making movements from side to side, as this contributes to damage to the structure of the plates. The file moves only in one direction – from left to right or vice versa.
-
Sanding and polishing stones also work exclusively on dry nails.
-
Spread a towel or napkin on the table surface, put a container of water on the cloth, which should be tolerably hot. A small amount of soap can be added to the liquid.
-
If you have a right hand, lower the left hand into the bowl so that the water covers the phalanges of the fingers. If the working hand is left, start the manicure on the right.
-
The little finger is processed first. Take it out of the water and dry the skin with a towel.
-
Take a pusher (the side on which the spoon is located) or an orange stick and carefully move the cuticle to the growth line of the nail plate.
-
Turn the pusher with the other, sharp side and clean the tissue under the cuticle.
-
Take the tweezers with which to cut off the keratinized skin on the sides of the marigold (this fabric has a white tint). The tweezers should run parallel to the marigold.
-
Take the tweezers and cut the cuticles, holding the tool perpendicular to the nail plate.
-
Do all these manipulations sequentially with the ring, middle, index and thumb.
-
When you finish doing a manicure on one hand, change the water, lower your other hand into it and repeat all procedures.
-
Then you need to dry your hands, polish your nails, massage the cuticles using a special nourishing oil. Next, you can apply a colorless protective base to the nails, which will protect the tissues from the negative effects of environmental factors.
How to do an unedged manicure at home

The advantage of unedged manicure is that it is not so bad for the cuticle. After trimming, you cannot immediately cover the nails with acrylic powder, shellac or gel polish, you need to wait a day. And after unedged manicure, you can apply a permanent decorative coating immediately. Plus, the more often you do a trim manicure, the rougher the cuticle becomes and the more difficult it is to remove it next time.
In a beauty salon or in a nail bar, unedged manicure is done using a special apparatus, which is equipped with a cutter and multiple attachments, the device operates at different speeds. Therefore, this type of manicure is also called hardware. At home, there is no way to use such professional equipment. Therefore, you can use nail files of different sizes, shapes and degrees of grit.
Unedged manicure is performed on dry hands, they do not need to be 'soaked' first. If certain areas and tissues need to be softened to facilitate their removal or correction, special products should be used.
Technique for performing unedged manicure at home:
-
Remove the decorative coating, wash your hands with soap and water and disinfect, dry your hands.
-
Using a nail file, trim the nails, give them the desired shape and polish.
-
Apply a product to help remove cuticles (keratolytic).
-
The little finger of the non-working hand is processed first. You need to take a pusher using a rounded end, or an orange stick, move the cuticle off the surface of the nail and remove it, it has softened, and it is easy to work with it.
-
Process the rollers on the sides of the marigolds with a hard nail file.
-
Wash and disinfect your hands, and then degrease the nail plates, for which you can use an alcohol solution.
-
After performing an unedged manicure at home, you can also massage the cuticles and fingers, cover the nails with a protective coating. And then treat your hands with a regenerating cream.
How to choose and execute the shape of the marigold

In order to get a beautiful effect as a result of a manicure at home, it will be useful to find out the following information about nails:
-
The general impression of the hands, the length and grace of the fingers depends on which shape of the free edge of the marigold you have chosen. Moderately long, oval or almond nails visually lengthen the fingers, while square ones, on the contrary, visually shorten them.
-
All five fingers on the hand have their own characteristics, as do the nails on them. The nail plates are not the same in width and length. For example, your thumbnail is the widest but also the longest. The nail plates of the little finger and ring finger are the most beautiful, as they have excellent proportions. This must be taken into account when determining the shape of the marigold.
-
The free edge of each nail should not only be identical in shape to the other marigolds, it should also have the same length. The difference in the length of the nails is especially noticeable if they are covered with a transparent product. And it looks unaesthetic.
-
If you make a mistake during the manicure process and one or more marigolds are shorter than the others or have a different shape, then it will be difficult to correct the mistake. Most likely, you will need to wait a few weeks before the time for a new manicure becomes possible, since fingernails grow at a rate of about 4-6 millimeters per month, and on the feet even slower.
-
If you have short, thick toes, it is best to opt for oval or almond-shaped marigolds. Moreover, the almond shape can only be given to sufficiently long marigolds, on short ones it looks ridiculous. If you have long fingers, you can make any shape you like, including square and soft square.
How to give your nails the desired shape at home:
-
Square – the marigolds are filed to the desired length; some careful movements are made on the sides of the plate to help emphasize the desired shape.
-
Soft square – the manipulations described in paragraph 1 are carried out; the straight corners are slightly rounded so that the cut line is soft.
-
Oval – the manipulations described in paragraph 1 are carried out; the file is applied to the corner of the nail at an angle of 45 degrees, the excess tissue is cut off, the nail is brought to the ideal shape by grinding. Some women prefer not to go through the square stage, processing with a nail file first one side of the marigold, then the other. But this method will not work to cut out a symmetrical beautiful oval.
-
Almonds – everything happens in the same way as in the case of the oval, only the nail file is attached to the corners of the marigolds at an angle not 45, but 60 degrees.
How to paint marigolds to get an even and beautiful coating

After a hygienic manicure done at home, you can paint your nails to give your hands not only a well-groomed, but also a beautiful look. It is not difficult to make a decorative manicure at home. The main thing is that you have a fresh product at your disposal. The fact is that the new varnish has an ideal consistency due to the fact that the solvents have not yet evaporated from it. As a result, it fits well on the surface of the marigold and dries quickly. But what if the agent was used infrequently and had time to thicken during the 'downtime'? Nail art experts do not advise you to immediately throw away the spoiled product. Perhaps it can still be reanimated. But only for this you cannot use acetone-based varnish remover or acetone itself. If you add this substance to a cosmetic product, it will simply curl up and become completely unusable. To dilute the thickened preparation at home, use a special solvent, which can be purchased at a cosmetics store. It takes only 3-5 drops to restore the normal consistency of the product.
How to apply a solid color varnish of a bright or dark color to your nails
The sequence of actions in the case of using a decorative means of a rich, bright color:
-
Remove the brush from the bottle, removing excess pigment by running a brush along the edge of the bottle.
-
Without lifting the brush from the marigold and without stopping, apply the product, starting from the middle of the surface to the cuticle, and then back to the free edge of the marigold. In this case, the brush should be at an angle of 45 degrees in relation to the surface.
-
Dip the brush into the bottle, remove the excess, place the brush on the surface near the cuticle. The brush should be located almost perpendicular to the marigold. Make a stroke in this sequence – along the cuticle, to the lateral zone, round off the movement along the surface contour up to the free edge of the plate. In the middle of the stroke, the brush goes from a perpendicular position to a parallel one. Then exactly the same smear is repeated on the second part of the marigold.
-
Dip a brush into a bottle and run it along the end of the surface, as if sealing it.
-
In this way, all nails are processed, after which you need to give the decorative coating time to dry.
Life hack from experts – in order for a manicure at home to be perfect, it is recommended to practice performing the necessary brush movements in the correct sequence on a special mannequin. And if you do not want to spend money on buying additional devices, practice your movements on an ordinary light bulb that has served its life. Draw a marigold-shaped figure on its surface with a felt-tip pen, and practice doing nail art correctly.

How to do a manicure at home using a solid nude or pastel varnish
If you plan to use soft, pastel, light, nude decorative coatings, the technique of their application is slightly different from that described above:
-
Remove the brush from the bottle and remove the excess liquid on the edge of the jar.
-
Place the brush in the middle of the plate. The angle of inclination should be approximately 5 degrees. Make a movement towards the cuticle and in the opposite direction, reaching the free edge of the marigold. In this case, there should be no brush pressure on the nail, only the varnish touches the surface.
-
Place the brush in the immediate vicinity of the cuticle, paint over this area, the lateral zone and reach the tip of the marigold. Repeat the procedure on the other side of the plate.
-
Dip a brush, squeeze it on the edge, run along the end of the marigold.
-
Home polish dries up in a few minutes, but professionals do not recommend exposing your nails to water, chemicals or mechanical stress for at least a few hours after the procedure.
How to make French nail art

There are many techniques for performing manicure at home. But one of the simplest, and at the same time quite effective, is a French manicure. Such a decorative coating looks very cute on the hands, elegant, restrained and always fashionable. French made at home is appropriate both at a gala evening and at a friendly party. And, of course, in the office, at school. Especially if classic color combinations are used for decoration – soft pink and white varnish. But you can experiment with other shades, light pastels, colors, if appropriate.
French is a type of manicure in which the main part of the nail plate is covered with a product of one color (pink, like a natural nail), and the free tip of the nail is highlighted with a strip of a different color, forming a narrow arc.
The main problem when doing a jacket is that at home and without some experience, it is difficult to make this very strip on the tip of the marigold even. Masters in beauty salons usually use a special brush for French manicure. You can buy it from a professional nail art store.
How to do a French manicure at home with a brush:
-
Apply a base coat to the nails so that the varnish stays on the surface longer and does not have a negative effect on the fabric.
-
Apply a soft pink (or any other light) preparation to the nails in two layers, carefully drying each layer.
-
Take a thin cosmetic brush, dip it in white varnish and paint a curved strip of the desired width on the tip of each nail. The bottom edge of the strip, the one closer to the base of the nail, should be perfectly flat.
-
Secure the result with a transparent or topcoat with a matte, glossy effect.
If this method seems too difficult for you to perform, you can make a jacket at home in another way:
-
Buy a set of stencils on an adhesive basis. A small curved strip is glued to the nail plate, dividing the areas that will be painted in different colors. After separating the free tip of the nail with a strip, you can apply white polish to it. This is done in the last stage of the manicure, when the pink layer is dry. After the white 'smile' dries, the stencil is removed, the entire surface of the nail is covered with a transparent finish.
-
Buy special stickers for creating a French manicure at home. Such crescents are glued to the nail in the place that, in theory, should be covered with white varnish. Then the nail is covered with a finish.
The easiest way to turn the most ordinary manicure with a transparent coating into a jacket at home is to paint over the free tip of the marigold on the inside with a special white pencil. But in this case, there are two inconveniences – in the process of staining the marigold, the skin of the finger pad, which is located under the free edge of the nail, gets dirty. It has to be wiped off with a cotton swab dipped in water. And after you wash your hands 2-3 times, the pigment is washed out from under the nails, the procedure has to be repeated almost every day. But it is quite simple, it can be performed even by those who do not have much experience in manicure.
How to do a neat quartz manicure at home

Quartz-style nails with many multi-colored streaks and veins are one of the main beauty trends in the field of nail art in recent years. To make a quartz manicure based on a simple hygienic one, you will need a semi-transparent varnish in pale pink, white, as well as a transparent topcoat.
Technique for performing quartz manicure at home:
-
Apply a base coat, primer to the nails.
-
Apply two coats of pink coat and let it dry completely.
-
Take a toothpick, dip it in white (or pearl, mother-of-pearl) varnish, draw chaotic lines that will imitate veins of quartz on the surface of the marigold.
-
While the light lines aren't completely dry, coat your nails with another coat of translucent pink polish to make them slightly blurry and more natural.
-
When the last layer of the cosmetic dries, cover the surface with a finish.
As you can see, there is nothing complicated, while varnishes can be used of the same type and shade as when creating a French manicure.
How to make a neat moon manicure for yourself at home

Lunar manicure, or, as it is also called, the reverse jacket, is also a very popular nail art technique. The main feature of nail design in this style is that it is not the tip of the marigold that stands out, but the hole – a light semicircle at the base of the plate.
There are two options for performing a moon manicure at home:
-
We take the base and top coat, light pink and light green (or white) varnishes. First, as always, the base is applied. Then a thin brush is taken, on which you need to type light green varnish. It denotes the contour of the nail, and at the base the strip of pigment should be slightly thicker, imitating, mirroring the shape of the tip of the marigold. After that, you need to take pink varnish and paint over the surface of the nail plate free from light green varnish with this pigment. The result is a very original and effective decor.
-
We cover the nails with a primer and pale pink varnish in two layers. We take white or beige varnish and draw a semicircle at the base of the marigold with a thin brush, which should look like a tiny eye. Then, when the cosmetics are dry, apply the topcoat.
You can easily perform such a simple manicure at home, and over time you can even modify the designs to your liking.


