
Operating systems Microsoft use drive letters and data readers. The system partition is assigned the letter 'C'. The rest of the hard drives and DVD drives are labeled sequentially, in the order of the Latin alphabet. Our experts explain how to change the default letter in the operating system Windows 7.
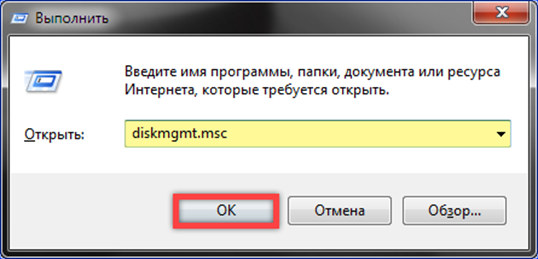
We call the Run dialog box with the keyboard shortcut Win + R. We type in the text box the command for direct access to the disk management console 'diskmgmt.msc'. Click the 'OK' button or the Enter key on the physical keyboard.
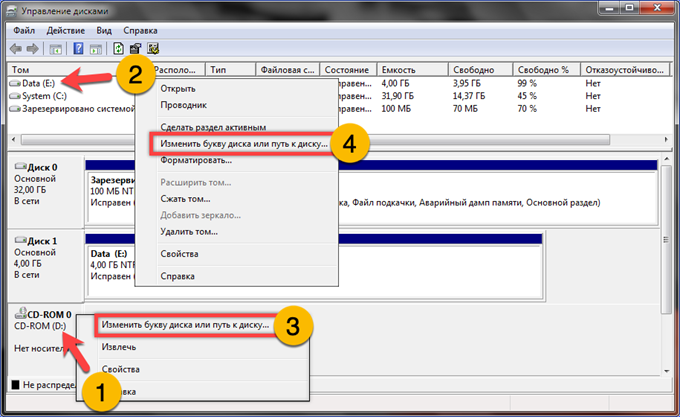
The following screenshot shows a classic example of a 'mess' where you want to change the local drive letter. A situation arises when the user adds a second drive to the system. Windows automatically assigns it the next free letter in order. As a result, the user has a main drive 'C' with the installed OS, CD-ROM 'D' and a new drive 'E'. The solution to the problem is simple. Release the letter 'D' by assigning any after the 'E' to the CD-ROM. Right-click on the drive icon, expanding the context menu. Select the item 'Change', marked in the screenshot with the number '4'.
In the pop-up window, expand the Latin alphabet hidden in the area marked with a unit. Select the desired letter 'D'. Click 'OK' to confirm the changes.

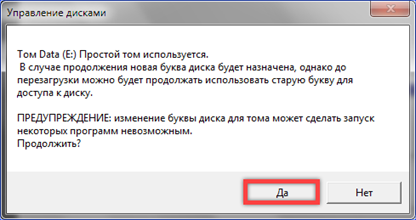
We agree to continue the operation by clicking on the 'Yes' button.

We give permission to the disk manager to change the letter for the selected drive.
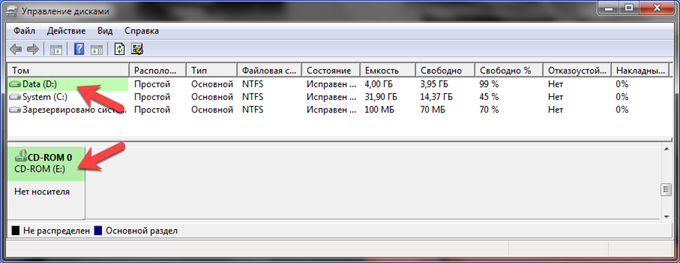
In the last screenshot, the arrows show the result of the operation performed. Discs are labeled sequentially, followed by CD-ROMs in alphabetical order.
Finally
Using a practical example, our experts have shown how to change the local drive letter in Windows 7 and in what situation it is necessary.


