
Engineers Microsoft provide several recovery options Windows 10. Their use allows you to return the operating system to operability from almost any state. Simple options require minimal user intervention. To use more complex ones, preliminary configuration is required. Our experts will tell you how to restore Windows 10 at boot.
Return to original condition
If the computer boots at least in safe mode, you can use the reset function.
Open the parameters Windows with the 'Win + i' keyboard shortcut. Go to the 'Update and Security' section.
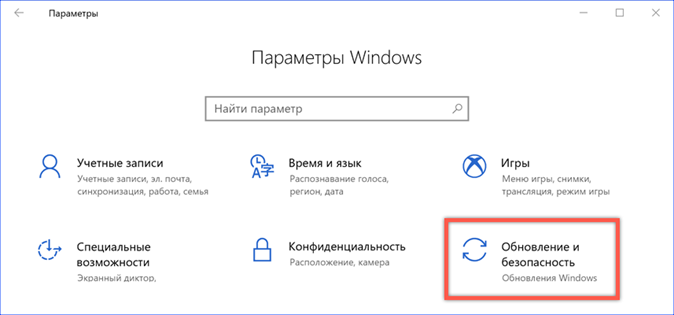
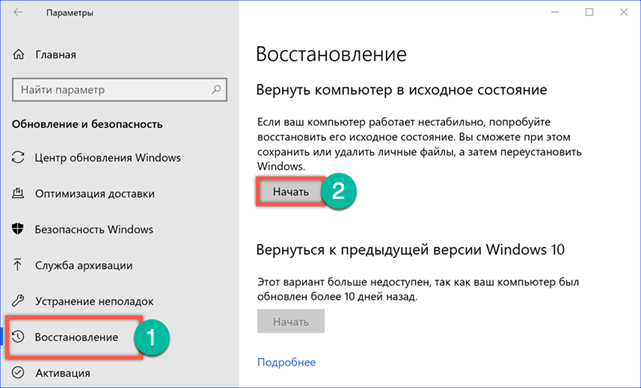
In the transition area we find the item 'Restore'. On the right side of the window, you will be prompted to return the computer to its original state. Press the button 'Start'.
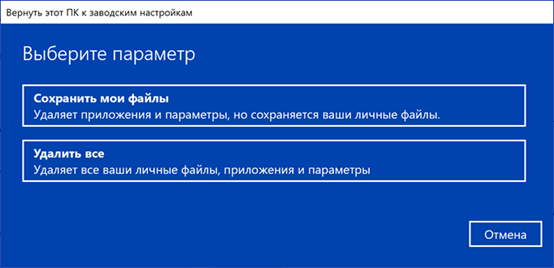
The recovery wizard window will open. At the discretion of the user, it is proposed to erase all information completely or leave personal data and remove only the installed software. We choose the preferred option.
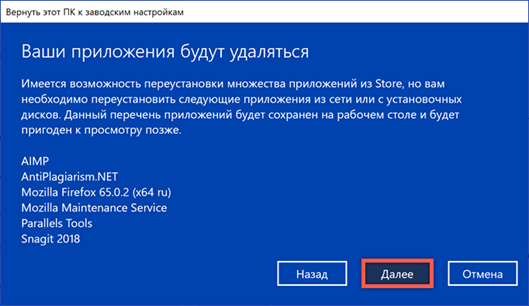
The wizard window displays a list of programs to be removed during recovery. You cannot change it, so click Next.
At the last stage, the wizard window shows what stages will be passed in the process of resetting the parameters. Press the 'Factory' button to start performing the listed operations.
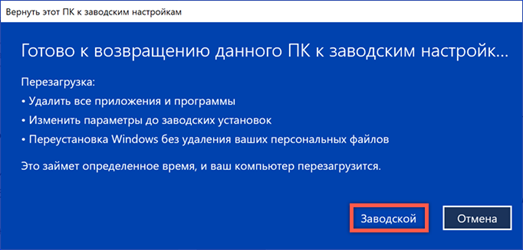
After several reboots, we get a clean one Windows in which all documents, photos and videos previously stored in the user folder are saved.
Using the New Start feature
Another recovery option that does not require preliminary preparation by the user.
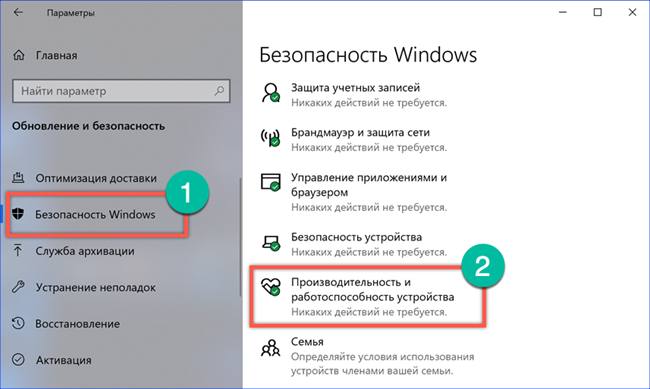
Similarly to the example described above, go to the OS settings and move to the 'Update and Security' section. In the transition area, select the item marked in the screenshot with the number '1'. A list of security settings will appear on the right side of the window. We find in it 'Performance and efficiency'.
In the settings window that opens, look for the 'New Start' section. Click the hyperlink marked in the screenshot with the number '2'.
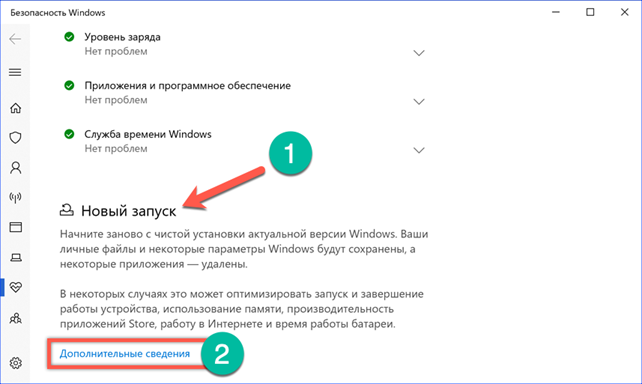
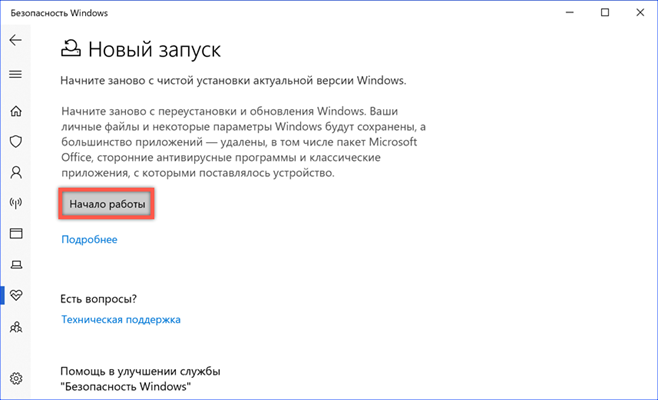
The updated window provides a brief description of the actions that the computer will take. Click on the button 'Get started' located below the text fragment.
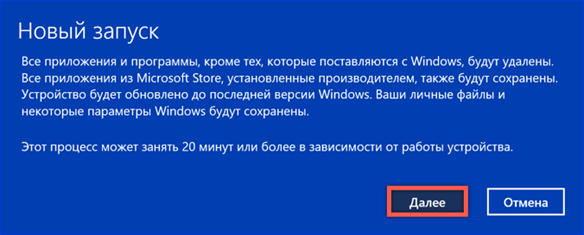
On top of all, a new wizard window will open with the next description of the upcoming operation. Click Next.
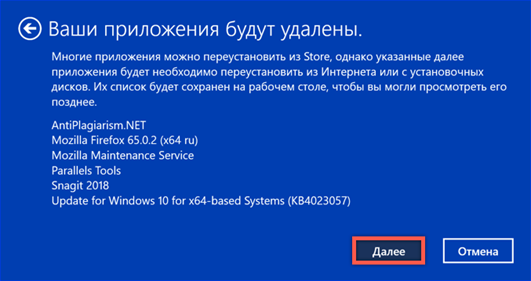
By analogy with the already performed reset to factory settings, a list of programs to be deleted is displayed. Click 'Next' again, moving on to the final stage.
We receive the latest recommendations from the installation wizard. Press the button 'Start'.

The time required for the 'New start' function is longer than for a reset. In this case, not just cleaning of installed programs is performed. The current version Windows is loaded in parallel. After completing all operations, the output is a clean and updated operating system.
Recovery points
System Restore first appeared in Windows Millennium Edition. Its task is to create so-called 'restore points' when installing OS or driver updates. In addition, the user can independently make a checkpoint manually at any time. When signs of unstable operation of the OS appear, a 'rollback' is performed, restoring to a previously saved configuration. Despite the obvious benefits of such a solution, users constantly complained about the too large amount of storage required for storing checkpoints. These requirements Microsoft were taken into account when issuing Windows 10. Now, for the recovery service to start automatically, the system volume must be larger than 128 GB. Here you need to understand that the system volume is not the entire hard disk, but a partition allocated for installing the operating system. Trouble may lie in wait for those users who, following the 'useful' advice, have divided a capacious HDD and allocated 50-60 GB for Windows. In this case, the recovery service will have to be enabled manually.
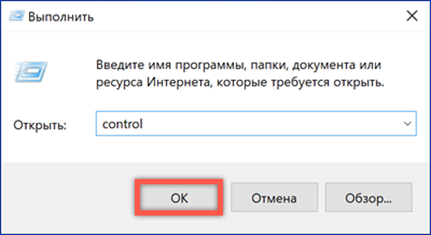
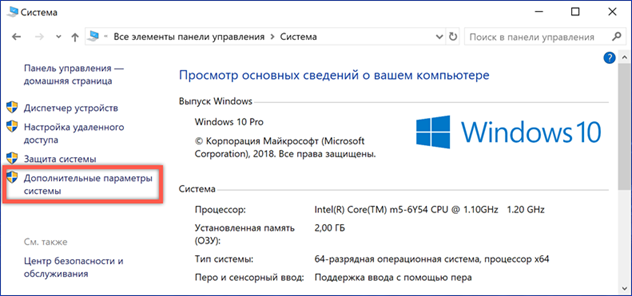
Launch the Run dialog box with the Win + r keyboard shortcut. Enter 'control' into the text field to invoke the classic control panel.
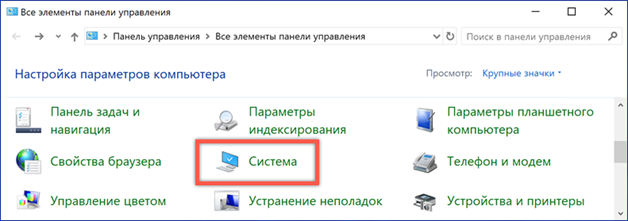
Find the section marked in the screenshot.
In the details window, open the 'Advanced options'.
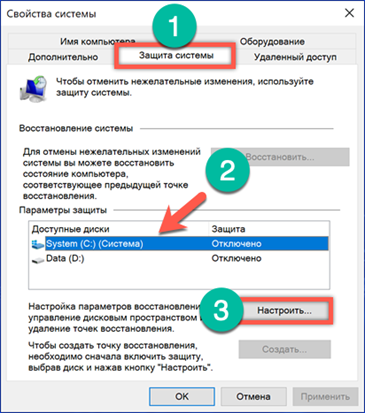
Switch to the 'System Protection' tab. In the area of available disks, select the system volume. In all versions Windows it is denoted with the letter 'C'. Click the 'Configure' button.
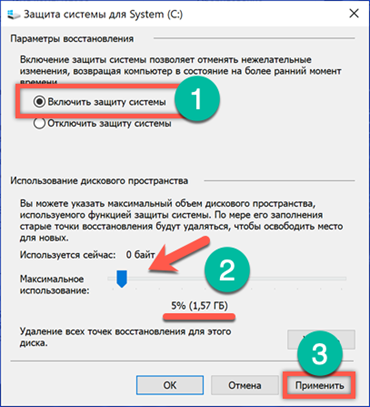
We activate System Restore by setting the switch to the position shown by the number '1'. The slider marked with an arrow allows you to adjust the size of the directory used to store recovery points. We apply the changes made.
After activating System Restore, the button highlighted in the frame becomes active on the 'Protection' tab. Click it to create the first restore point. The system will ask you to set a name for it, and after a while it will give you a notification about the successful completion of the operation.

Using System Restore
Further actions assume that the user can start the operating system, but it does not work correctly.
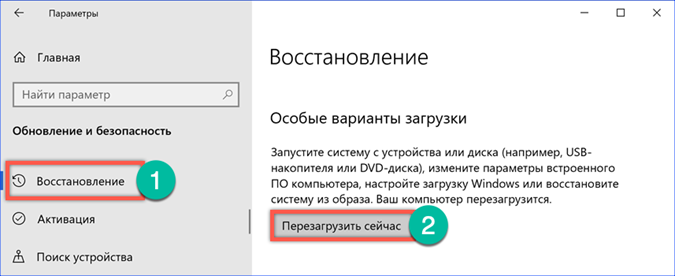
Head over to the Update and Security section of the settings Windows. In the navigation area, select the 'Recovery' item, and on the right side of the window we find the 'Special boot options'. After clicking on the button marked with a two, the computer will go to reboot.
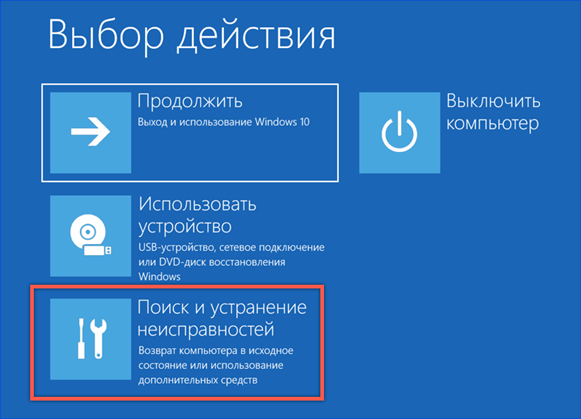
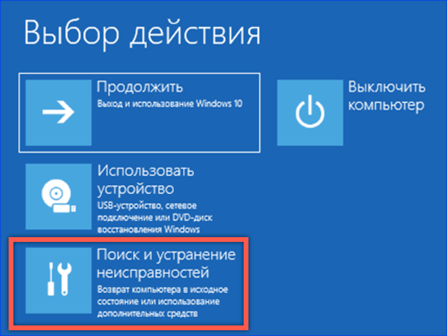
The dedicated boot menu is a simple graphical interface with options to choose from. We switch it to 'Troubleshooting'.
We select the second item in the menu that opens.
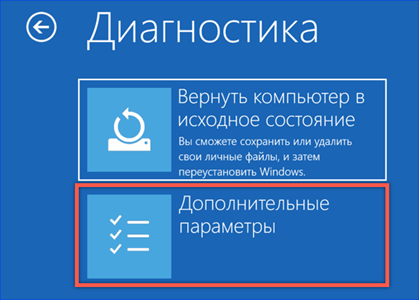
In the additional parameters, we use the first item shown in the screenshot with a frame.

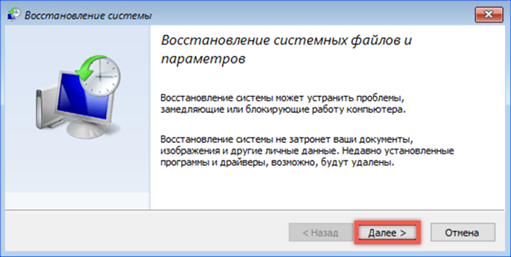
The system will ask you to select a user account and confirm it by entering a password. After completing these operations, the recovery wizard menu will open. Click the Next button.
The next window lists the restore points that you can use. For convenience, they can be sorted by creation date, description, or type. We choose the most suitable one in terms of parameters.

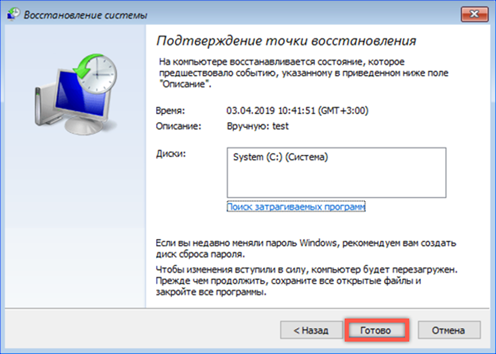
At the last stage, the wizard displays a brief description of the selected point. It is possible to go back and choose another. Make sure to choose the correct 'rollback' option and click 'Finish'.
We receive the last warning. Agree by clicking 'Yes'. We are waiting for the system to perform recovery and boot in normal mode.

System image
The system image is a 'snapshot' of the state Windows that the user independently takes at the right moment in time. The most common practice is to create it after installing the necessary set of drivers and working software.
Open the classic control panel and find the section marked in the screenshot.
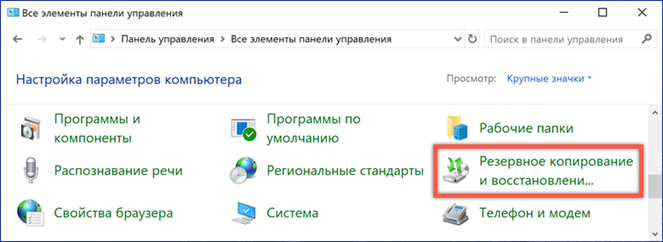
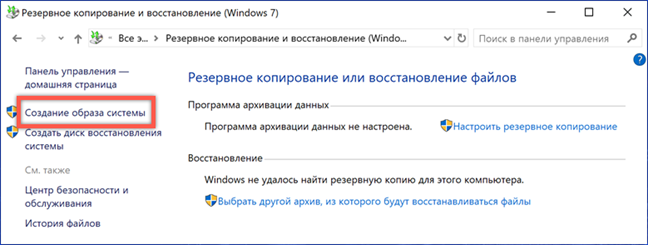
In the navigation area, select 'Create a system image'.
A second hard drive is installed on the test computer, which is automatically determined by the wizard as the storage location for the archive copy. There is also an option to burn to DVD or network folder. It will be most convenient to use a separate hard drive, since it does not have to be connected to a computer for recovery.

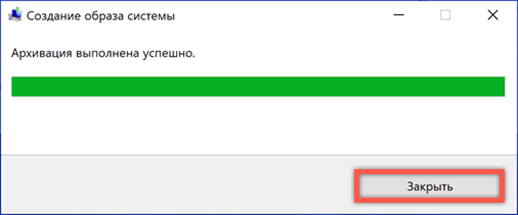
We check the parameters selected for creating the image. Press the 'Archive' button to start copying.

The operation time depends on the amount of data being copied and the type of hard disk used as destination storage.
After completing the backup, you are prompted to create a recovery disc. We refuse, since only DVD can be used for this purpose, and this is no longer the most convenient and widespread medium.
Recovery from image
To restore the operating system at boot time, use the menu of its special options again.
The first three steps are completely similar to those performed when working with System Restore points. You need to get to the additional options of the recovery menu. Here we select the item shown in the screenshot.

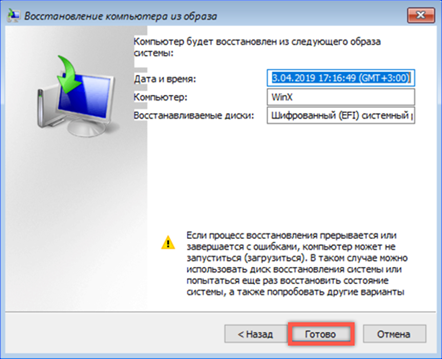
After a short wait, the imaging wizard is activated. By default, the most recent backup is offered for recovery. Using the switch indicated by the arrow, you can view earlier archives and select the appropriate one from them.

You don't need to change anything at this stage. For the system volume, the structure of partitions and folders that existed at the time of the archive creation will be restored.
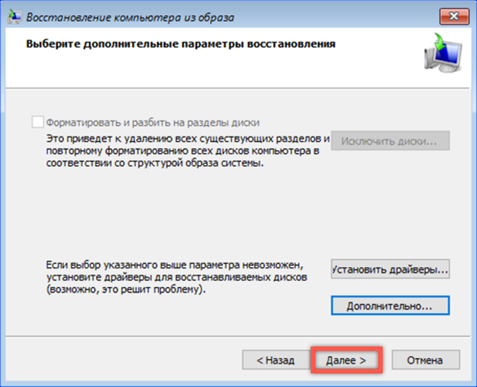
We are convinced of the correct choice of the image and click 'Finish'.
We confirm our desire to restore the system of their archived copy. Clicking on the 'Yes' button will activate the recovery process. During the operation, the system volume is cleaned up, checked for errors, and then overwritten with data from the selected image.

Using the installation disc to repair
All the previous methods assume that the operating system can be loaded somehow in order to activate one of the possible recovery options. If the computer cannot boot from the system disk, we will use the installation media with the distribution kit Windows 10.
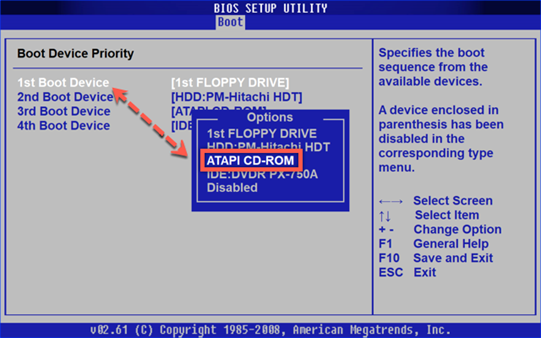
We go to the UEFI / B settings IOS. Find the 'Boot' section and open the item marked with a frame.

Change the order in which the computer selects download sources. The first device (1st Boot Devise) must match the type of installation media. Install DVD or USB here. We record the changes made and exit B IOS.
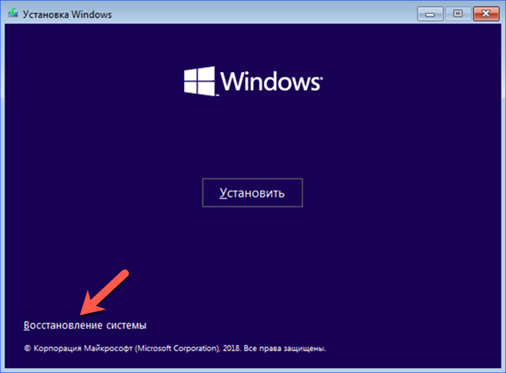
The computer, having identified the connected boot disk or USB flash drive, launches the operating system installer. In the first window that appears, check the regional settings and click 'Next'.

Instead of launching the installer, we use the link indicated in the lower left corner of the window.
The recovery environment Windows is activated by displaying the standard action selection menu. When you open the Troubleshooting section, you can choose between restoring from an image or using points created with System Restore.
Finally
System Boot Recovery at Windows 10 has been simplified to the extreme. By and large, all user actions are reduced to the correct execution of the prompts of the corresponding wizard. The presence of previously created restore points or an archived image allows you to restore the operation of your computer even if it does not boot normally.


