
Web browsing statistics are stored in the browser and are often a useful tool. Using this function, you can restore an accidentally closed tab or return to a resource found a few days ago, but not saved in bookmarks. Sometimes circumstances develop in such a way that records regarding the history of surfing in Google Chrome need to be deleted. Our experts talk about the ways in which this operation can be performed.
Google Chrome browser settings
Browser history refers to editable parameters and is controlled from the settings.
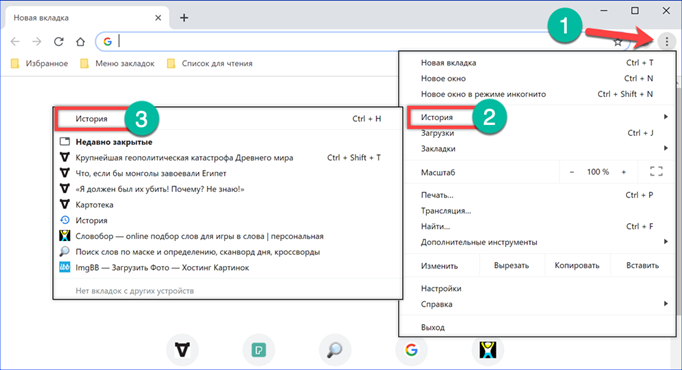
Click on the ellipsis to the right of the combined address search bar. Calling the control menu, select the 'History' item. In the drop-down list, we see another line with the same name. Click on it, opening the tab that stores the records of the pages visited.
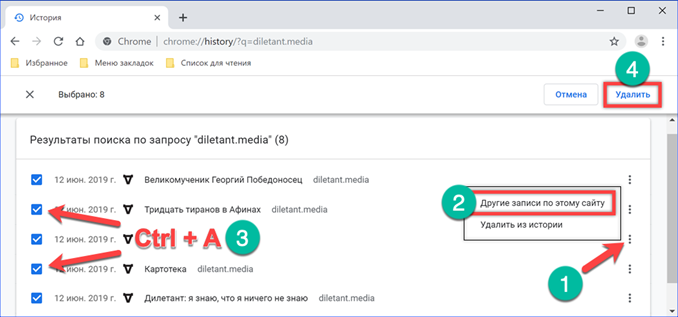
On the right, each line ends with an ellipsis intended to call the control menu. By selecting the item marked with a frame, the entry can be removed from the list of visits.

The second item in the menu is intended to display all data related to a particular page. Selection from the general list is performed using a URL filter. You can delete later both individual rows and the entire collection of data. There is no special option in Google Chrome to completely erase records. You can get around this developer miscalculation by using system-wide hotkeys. In the active Chrome window, press the combination 'Ctrl + A'. As a result of its application, all filtered rows of records are selected with checkmarks. Press the button shown in the screenshot with the number '4' to remove them from the browser history.
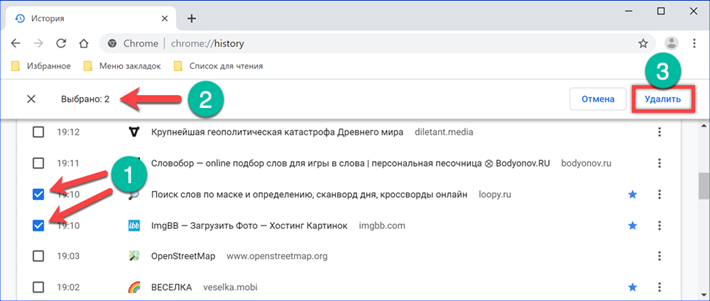
Records can be edited by sequentially scrolling through the list and highlighting unnecessary checkboxes. The total number of marked items is counted and displayed in the area shown by the number '2'. Having finished the selection, we press the 'Delete' button, erasing the unwanted details of the Google Chrome history.
Clearing Google Chrome by Time
If you go a little deeper into the browser settings, you can find options for deleting records by time period.
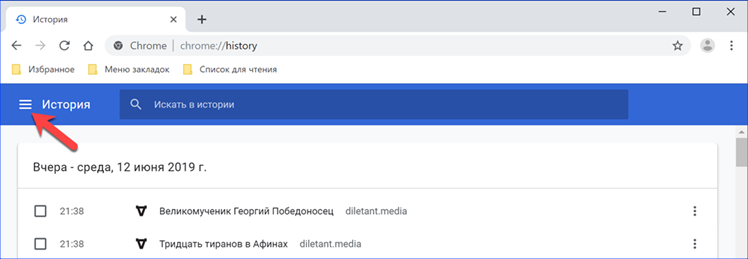
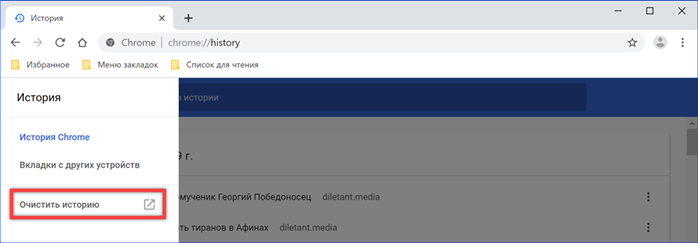
Having opened the history of Chrome from the control menu, click on the area marked with an arrow in the following screenshot.
In the appeared side panel, select the item highlighted by the frame.
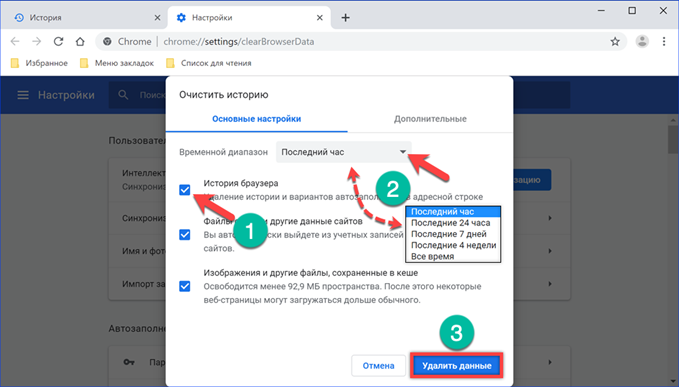
The browser will open a settings page and a pop-up menu with cleaning options. On the main tab, check that a check mark is put in front of the 'History' line. The drop-down list called in the area marked with the number '2' in the screenshot contains temporary parameters. Select a suitable segment and press the 'Delete' button.
If you switch to the Advanced tab, you can clear the archived records of completed downloads. The required time interval, the values of which are similar to those discussed above, are set using the drop-down menu. Having determined the appropriate parameters, click 'Delete' at the bottom of the window.

Google Chrome account history
Users using Chrome in conjunction with a Google account should be aware that browser history is automatically copied and saved in the 'cloud'. Together with geolocation data, it is further used to adjust search results and display 'targeted' ads.
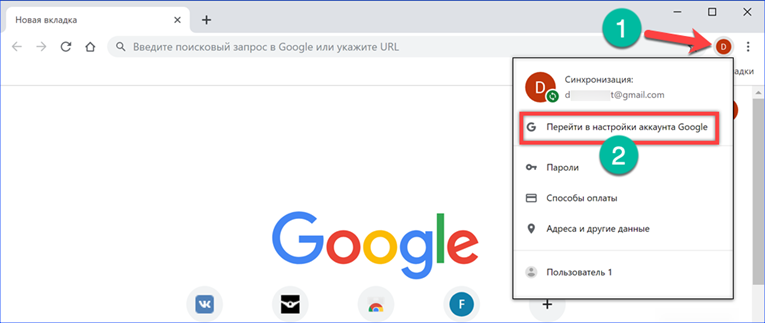
Click on the user icon to the right of the address bar. It appears in place of the generic avatar when logged into Google services. In the expanded menu, select the 'Go to settings' item, indicated in the screenshot by a two.
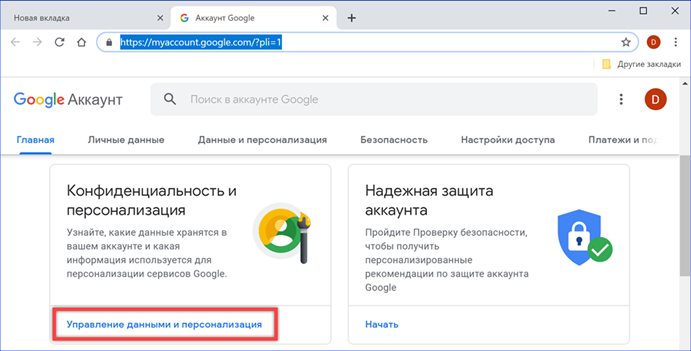
After logging into your account, we are looking for the 'Privacy and Personalization' parameter block. We click on the link “Management”, opening its contents.
We move to the section 'Tracking actions'. Open the item highlighted in the screenshot by the frame.
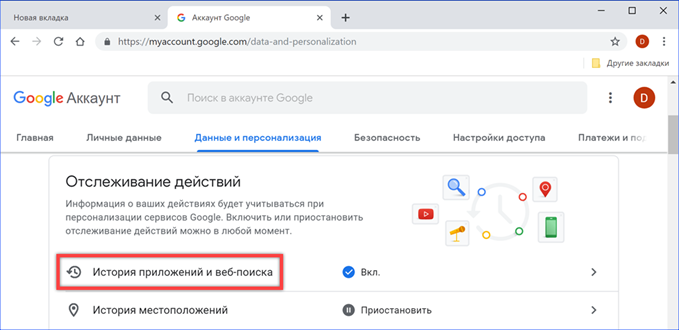
Here we will use the link 'Manage history'. In order not to do this every time, you can immediately turn off the cloud recording functions. Remove the checkmark marked with the arrow and the number '2' and move the switch indicated by the three to the 'Disabled' position. After that, Google will stop tracking and recording the history of surfing and search queries.

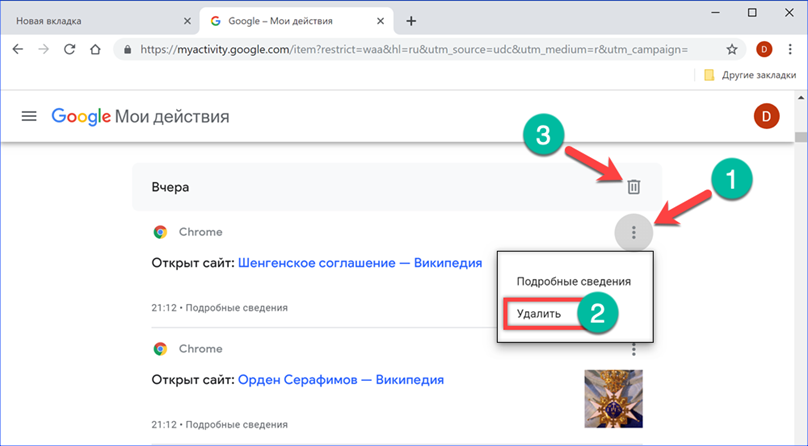
Records are managed in the same way as in the browser settings. Click on the ellipsis at the end of the line with the address of the visited page. In the drop-down menu, select 'Delete'. If you have to clear a large array of data, use the trash can icon. The records in the 'cloud' are grouped by day, and it is located opposite each date.
In the pop-up window, we confirm the desire to clear the history for the selected date by clicking the link indicated by the frame.

Configuring the storage period for history in Google Chrome
Google stores data indefinitely by default. When you need to delete history for a period more than one or two last days, use the advanced settings of the web service.
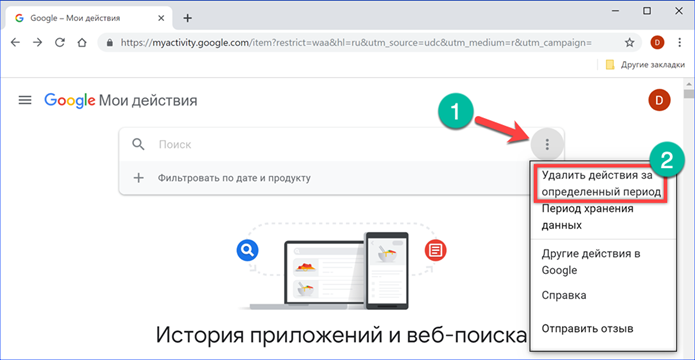
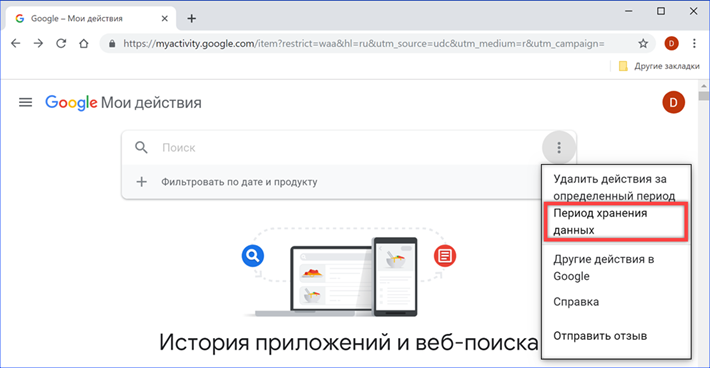
We return on the history management page to the beginning, to the search field. Click in it on the ellipsis shown by the arrow. We select the item 'Delete for a certain period'.
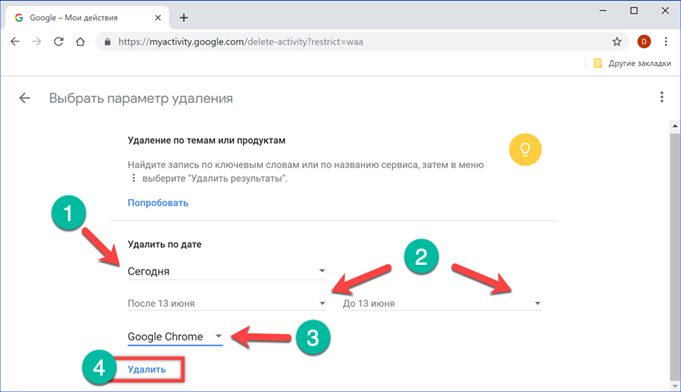
In the field marked with the number '1', a preset value is selected: today, 7 days, 30 days. If these parameters do not suit you, set the time limits using the line with the drop-down calendar. Separately set the start and end dates of the erased period. In the next field, specify Google Chrome by selecting it from the list of available services. We complete the actions by clicking the 'Delete' link.
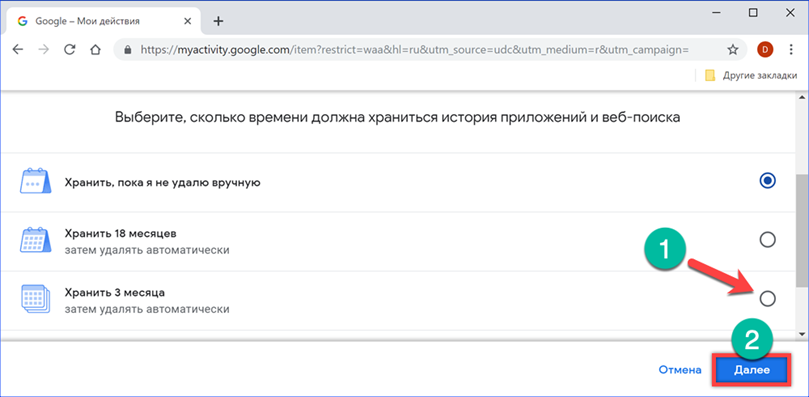
Let's go back to the top of the settings page. In the same list that opens from the search field, select the item 'Data storage period'.
We indicate the minimum available shelf life, which is three months. Click 'Next', moving on to the next step.
The service will ask for confirmation to delete the records previously saved in the archive. For this we use the button marked with a frame.
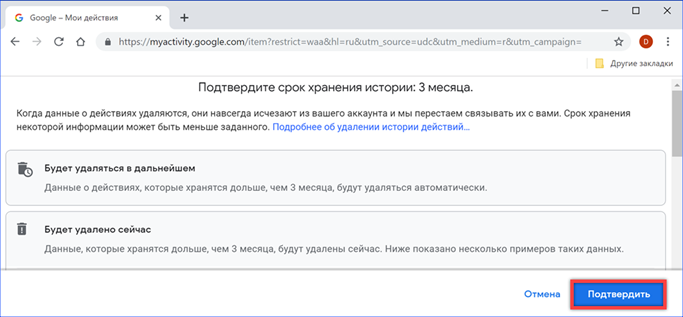
Google will report that the archive of old records has been erased, and user settings have been saved. In the future, all records of the history of actions and web searches will be automatically destroyed after the three months allocated for their 'cloud' storage.

Chrome extensions
Google has not implemented an automatic history clearing feature in the browser settings, which many competitors have for a long time. You can connect it using extensions.
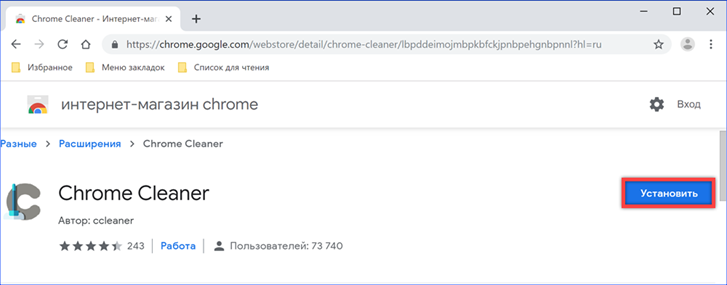
We go to the Chrome online store using a direct link. Install the 'Chrome Cleaner' plugin.
It works simply and does not contain any settings. Press the extension button on the browser panel calling the control menu. Hover over the 'History' section. At the same time, as shown in the screenshot, it is highlighted in blue. By clicking on the left side, with the eye logo, you can go directly to the browser history page. Further actions in it are performed manually and are considered at the very beginning of this material. The second icon, with the image of the trash can, instantly deletes all records in history without asking for confirmation.

Следующее рассматриваемое расширение – 'Close&Clean'. The developers have provided it with flexible settings designed to automate the cleaning process. We download it from the online store using a direct link.

По умолчанию 'Close&Clean' настроен таким образом, чтобы клик по его иконке в панели обозревателя завершал работу Chrome. We call the extension control menu with the right mouse button. We select the item 'Parameters'. First of all, we change the settings related to the behavior of the plugin icon by putting a checkmark in the area indicated by the number '3'. The first prohibits closing the browser, and the second requires you to prompt for user confirmation for actions to be performed. Having dealt with the general settings, let's move on to automation. В блоке 'On Close' назначаем действия, которые будут выполняться 'Close&Clean' при закрытии окна обозревателя и завершении его работы. We put a tick in the items indicated by the arrows and indicated by the number '4'. When a Chrome user session ends, the extension will automatically erase the browsing and download history.

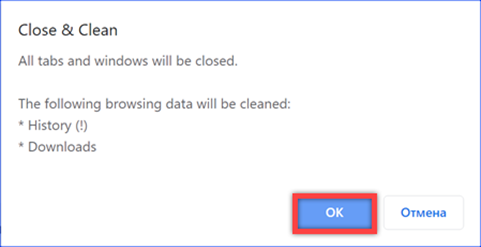
В соответствии с ранее заданными параметрами действий при закрытии браузера, 'Close&Clean' каждый раз будет запрашивать подтверждение перед удалением записей.
Surfing without history recording
For users who do not want to bother with cleaning or install additional extensions for this, we recommend using incognito mode.
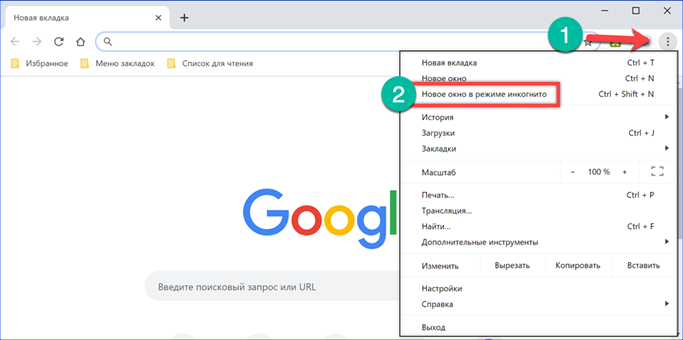
Launch the browser control menu. We select the item marked with a frame in it.
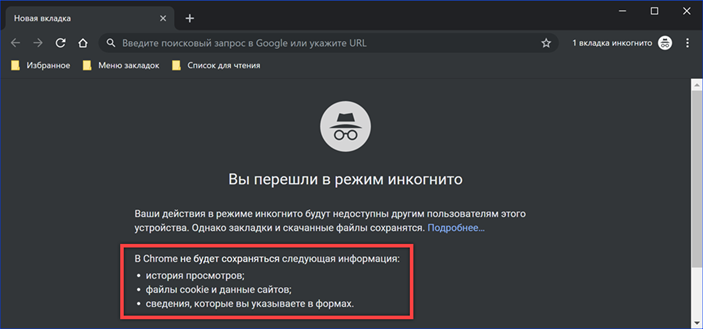
Above the current window, another window will open with a black background accompanying the work in incognito mode. As you can read in the area highlighted in the screenshot, when using it, the history of visiting web pages is not saved. A relative disadvantage of this method is the need to manually enter passwords to access resources that require authorization. Optionally, this limitation is bypassed by add-ons, which will need to be allowed to work in incognito mode.
Finally
The recommendations provided by our experts allow you to clear history on your computer and in the Google cloud, as well as configure the order of further data storage. Using extensions makes it possible to simplify or even automate the erasing process as much as possible.


