
For users, advertising is a real curse. It is present on almost any website, slowing down loading speed, distracting attention and making it difficult to find useful information. Special blocker plugins help to prevent the appearance of advertising banners. Our experts talk about how to install the AdBlock extension and its analogs in Google Chrome and get rid of intrusive ads on the Internet.
Installing AdBlock in Google Chrome
In order to maintain the security and stability of its browser, Google has restricted the installation of add-ons from third-party sources. Once verified, they are all collected in the Chrome Web Store. This solution makes life much easier for users and systematizes the receipt of updates. There is no need to search for developer sites or check for new software versions.
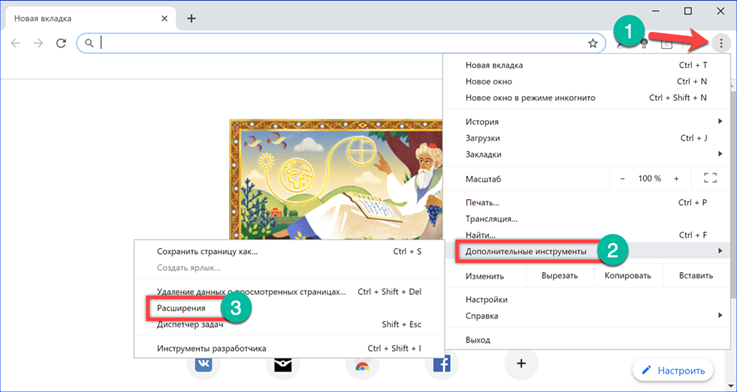
We open the browser control menu by clicking on the ellipsis symbol located to the right of the combined address and search bar. Go to the 'Additional Tools' section and select the 'Extensions' item in the list.
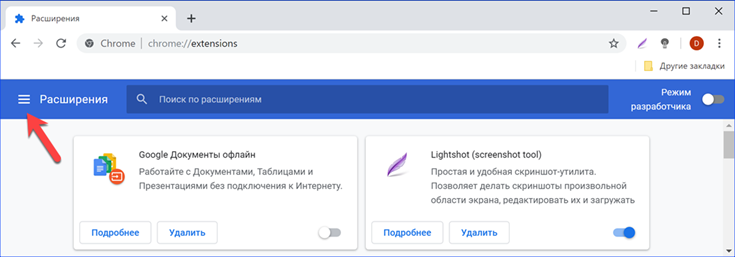
On the page with installed modules of additional features, click the icon indicated by the arrow with three horizontal lines.
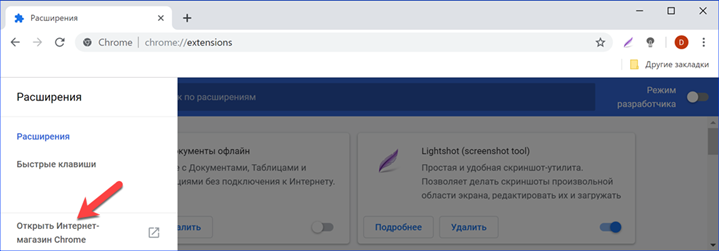
At the bottom of the sidebar, there is a link to go to the online store.
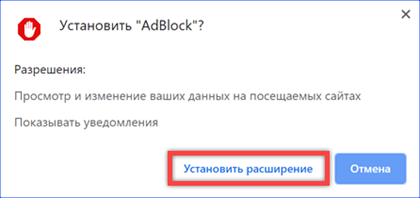
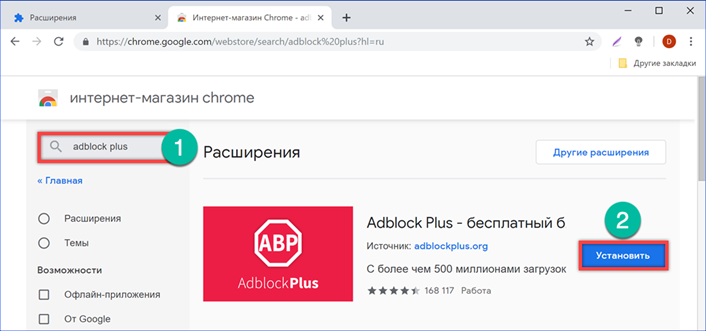
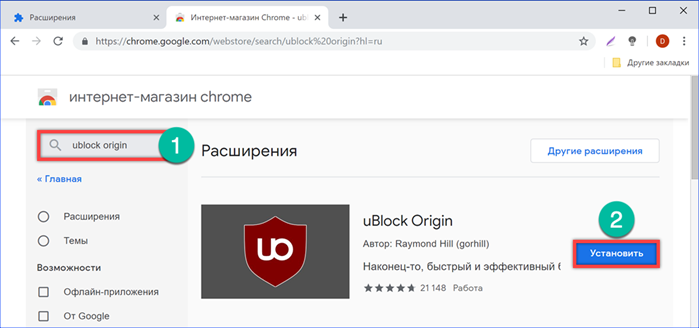
We type in the search box 'adblock'. In addition to the name, the selection is also carried out by popularity, so the required addition appears first in the list. Click the 'Install' button.

We confirm the desire to add an additional module to the browser.
At the last stage, a new tab will open in Google Chrome with a proposal to make a donation to the authors of the plugin. Those who wish to help the developers can choose a fixed amount of the contribution or specify its amount on their own. Since the payment is made on a voluntary basis, you can simply close the tab.

Setting up blocking rules in Google Chrome
For the most effective use, the installed blocking module must be configured.
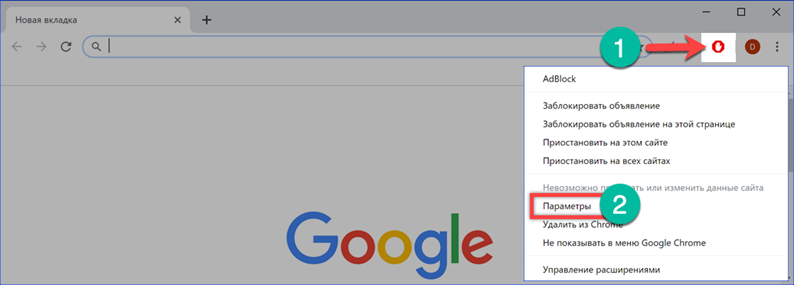
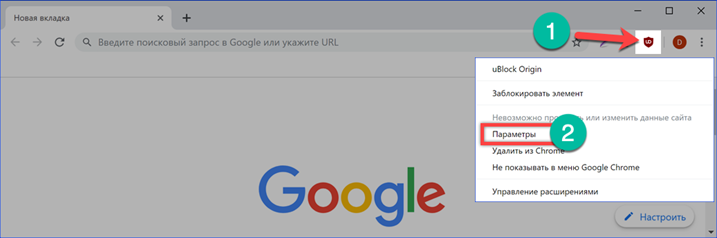
Click on the AdBlock icon by selecting it in the browser panel. In the drop-down menu, select the 'Parameters' item.
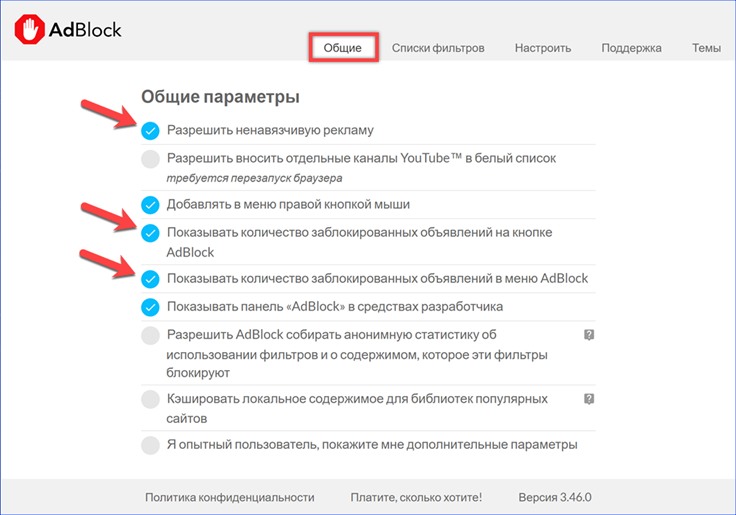
On the 'General' tab, uncheck the boxes marked with arrows. There are no unobtrusive ads, and the number of blocked elements has no informational value. The counter on the plugin icon will be constantly replenished, and changing numbers will also distract attention.
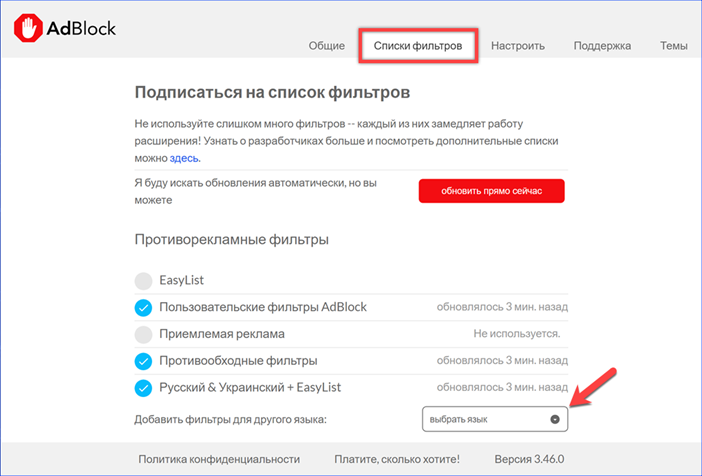
The next tab in the blocker options that deserves attention is 'Filter Lists'. For convenience, our experts have divided it into two halves. The first part deals with ad content filters. By and large, you can leave everything as it is here. The only point worth noting is filtering by language. If you have to often refer to foreign sites, he can help, although most banners are still blocked for signs that are not related to linguistic features.
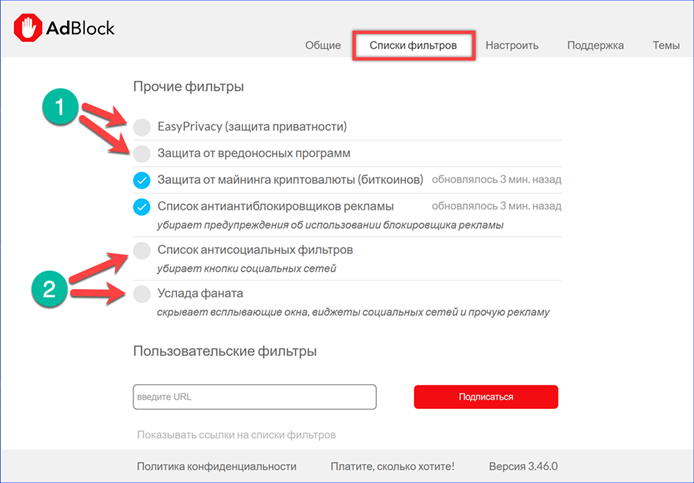
The second part of the list of settings, called 'Other Filters', expands the user's protection area and goes beyond simple ad blocking. By default, it looks like the one shown in the screenshot. The number '1' denotes a group responsible for enhancing privacy and protecting against malicious content. The two marks the parameters of counteracting social networks. Whether or not to use these opportunities, each user decides for himself.
Installing and configuring AdBlock Plus in Google Chrome
Another popular ad blocking extension hosted on the Chrome web store is AdBlock Plus.
The installation procedure is the same as described above. Go to the Chrome web store and type the add-on name into the search field. Click the 'Install' button.
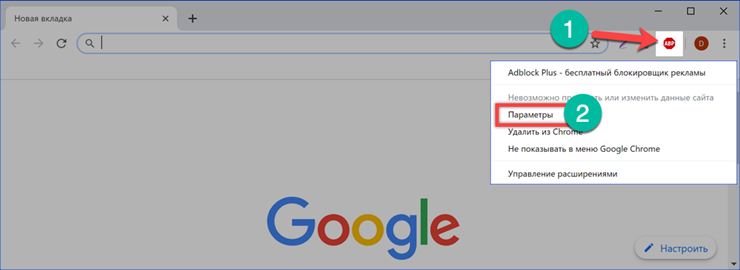
To configure AdBlock Plus, open the context menu by right-clicking on its icon. Open the 'Parameters' item.
We start with the 'General' tab. The switches included in the field designated by the number '2' are intended to expand the capabilities of the blocker and are not associated with advertising. Their use is optional and remains at the discretion of the user. Going down on the page, uncheck the box 'Acceptable advertising'. The checkbox of the last section 'Anti-bypass' is best kept on. Many sites have learned to detect the use of anti-adware modules by browsers. When you visit them, a pop-up window appears with a request to temporarily disable the blocker so as not to let the site owner around the world. The parameter marked in the screenshot with the number '4' allows you to avoid such notifications.

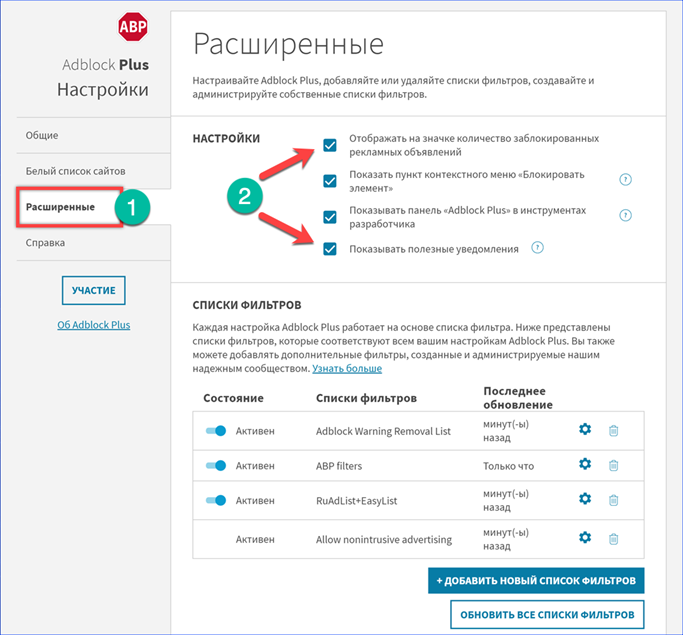
Go to the 'Advanced' section. Uncheck the boxes opposite the first and last settings item, which are indicated by the arrows in the screenshot. The filter list can be left unchanged.
uBlock Origin installation and configuration in Google Chrome
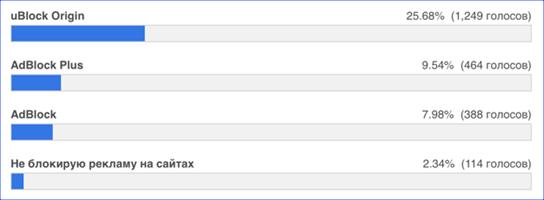
The last considered ad blocker, uBlock Origin, is rapidly gaining popularity among users, taking first place in 2018 and overtaking both AdBlock options discussed above.
Like other add-ons, we find it in the Chrome store using the search bar.
After the installation is complete, call the context menu and open the 'Parameters' item, going to the extension settings.
On the first tab, we traditionally get rid of the counter of elements blocked on the page.

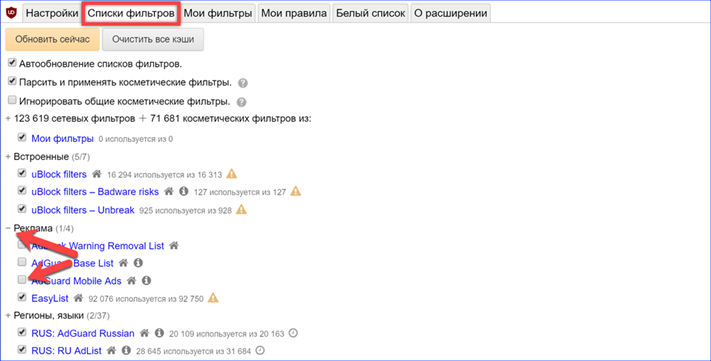
The uBlock Origin licensed free software has the richest set of filters. In addition to your own block lists, you can connect additional databases in the settings. To do this, expand the group of parameters by clicking on the plus sign in front of it and adding new filters by ticking the checkboxes. Another useful advantage over the competition is that uBlock does not have an 'unobtrusive ad' base. The extension blocks everything it can reach.
Finally
Using the example of several popular extensions, each of which has an audience of more than ten million users, our experts have shown how to install and perform the initial configuration of an ad blocker in the Google Chrome browser.


