
Browser notification technology, or Web-Push, is relatively new, but quickly adopted by marketers. It is actively used not only by online stores and news portals, where it can be useful. Web-Push is rapidly becoming a new type of spam, with the result that the computer is bombarded with dozens of messages. Our experts figured out the intricacies of setting up notifications in the Google Chrome browser and tell you how you can turn them off.
Disable Web-Push from Google Chrome Address Bar
Displaying a Web-Push message requires user consent. Only after that an individual digital token is generated on the website. This technology was originally intended to protect the user from spam, since each page would have its own list of subscribers, not united by email addresses or phone numbers. In addition, the transfer to the target computer can only be organized over the secure Internet protocol HTTPS.
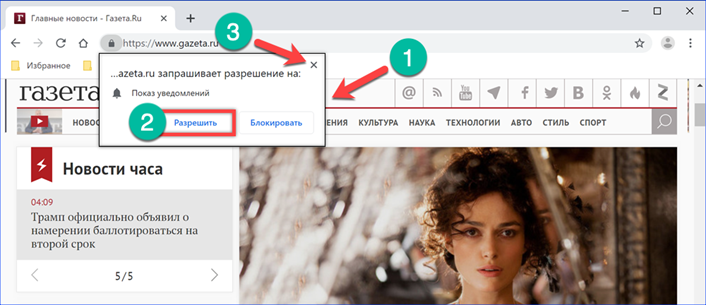
Entering the site, the developers of which have provided for the display of notifications, the user will see a request window. It has two buttons: 'Allow' and 'Block'. If a categorical decision cannot be made at the moment, close the request like a regular window by clicking on the cross in the upper right corner. Periodically, until an unambiguous choice is made, the site will remind the user about the possibility of sending notifications to his computer. If the pop-up window cannot be closed or some content is blocked from displaying until consent is obtained, there are signs of phishing, tricking the user into subscribing to Web-Push. It is best to leave such a page right away so as not to suffer in the future from streams of spam.
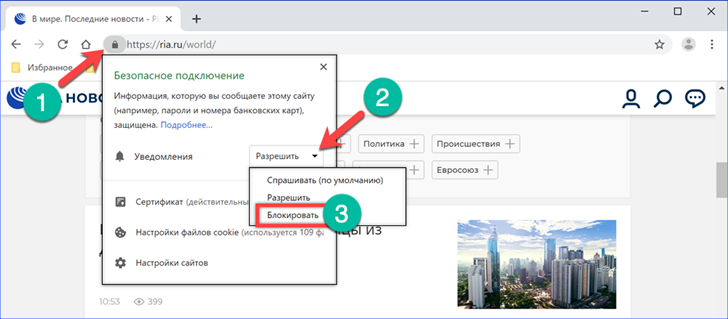
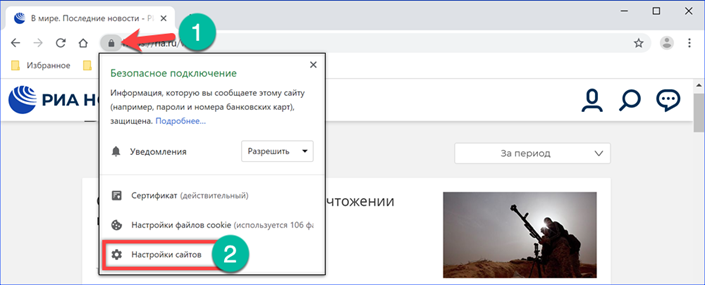
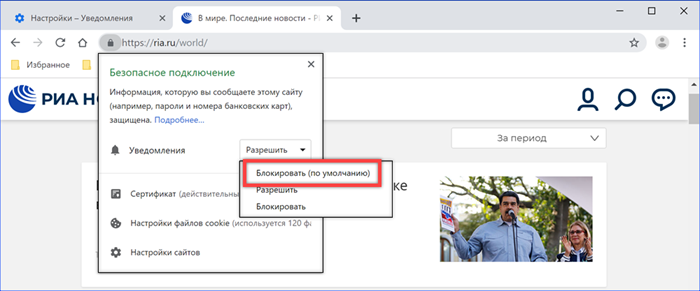
The control menu for web push notifications is opened by clicking on the secure connection icon. In browsers, it is usually denoted by the icon of a closed padlock placed in front of the site's URL in the address bar. By clicking on the area shown by the number '2', we call a drop-down menu of three items: 'Ask', 'Allow' and 'Block'. By default, this parameter is always set to obtain user consent. To revoke the permission issued in the initial pop-up window, select the 'Block' item.
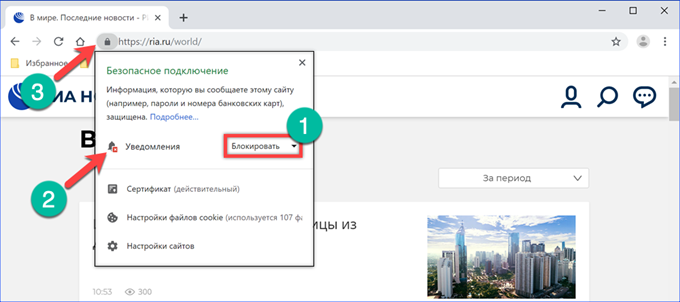
The bell icon is decorated with a red cross when notifications are prohibited. You can close the menu by clicking on the secure connection icon in the browser address bar or by clicking on the button in its upper right corner.
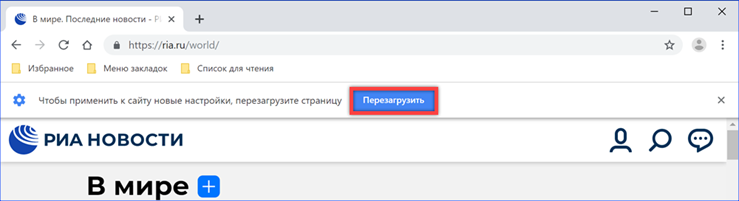
For the site to accept the new rules for processing notifications in the pop-up panel, press the 'Reload' button. The current tab will be updated, after which push notifications from the selected page will no longer be sent to the user's computer.
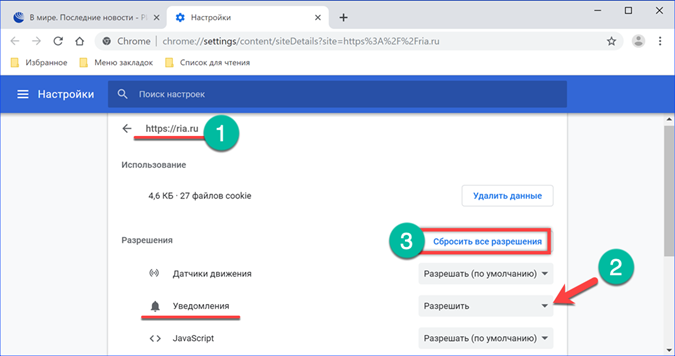
Access to advanced content playback control is opened by the last item in the control menu.
In the area shown by the number '1' in the screenshot, the page URL is displayed so that the user does not accidentally change the settings for another site. The 'Permissions' block contains all the parameters of interaction with the page. We find the item 'Notifications' in the list. A drop-down menu is shown opposite it. It contains the same items as on the main page: 'Ask', 'Allow' and 'Block'. If several parameters have been changed on the site, you can simultaneously return them to their default values. The button 'Reset all permissions' is used for this purpose. When pressed, the user-defined settings for the individual interaction settings are reset to their original state.
Accessing the main menu in Google Chrome
In addition to adjusting the Web-Push settings for each site individually, you can set general rules of behavior for Google Chrome when working with notifications. To move to the main menu, use any convenient method described in this chapter.
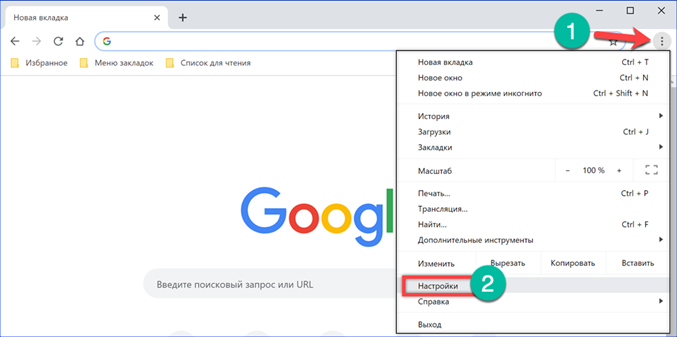
Click on the ellipsis symbol located in the browser pane to the right of the combined search and address bar. In the control menu, select the 'Settings' item.
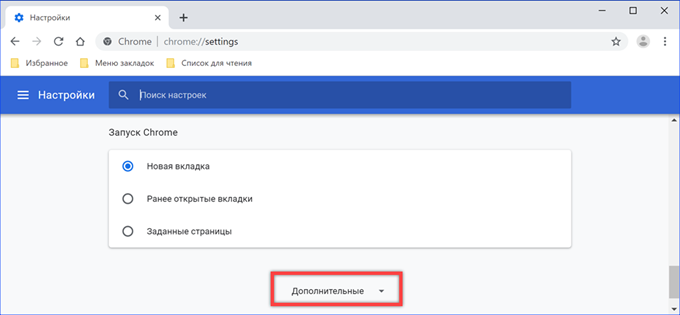
Go down to the end of the page and click the 'Additional' area indicated in the screenshot by the frame.
Find and expand the 'Site settings' section.

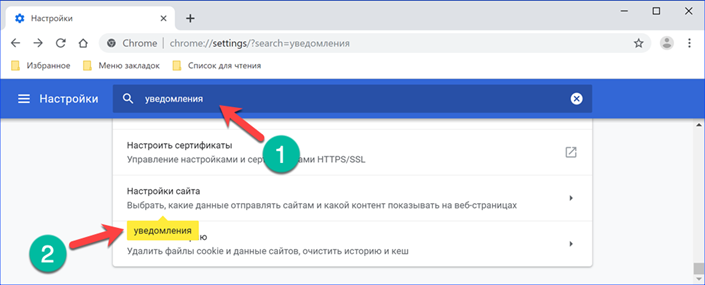
You can shorten the 'journey' through the submenus by using the search field. On the initial page of settings, we type 'Notifications' and the section containing this parameter will be highlighted in the general list. The Advanced area will open automatically.
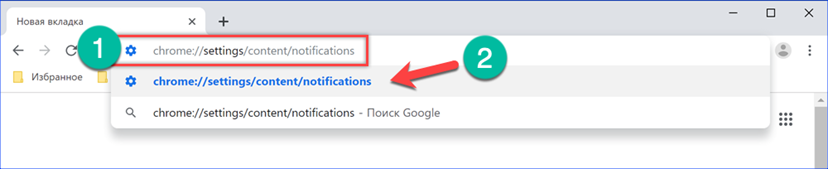
An alternative to searching would be to directly set the path to the desired settings section in the address bar: 'chrome: // settings / content / notifications'. It can be copied from here or entered manually. As you type, Chrome displays interactive hints to help you navigate faster. The internal browser settings are marked in blue, and the search engine is indicated next to the external links.
Disable notifications via main menu options
Having opened the main menu of Google Chrome intended for working with notifications, we will take a closer look at the features included in it.
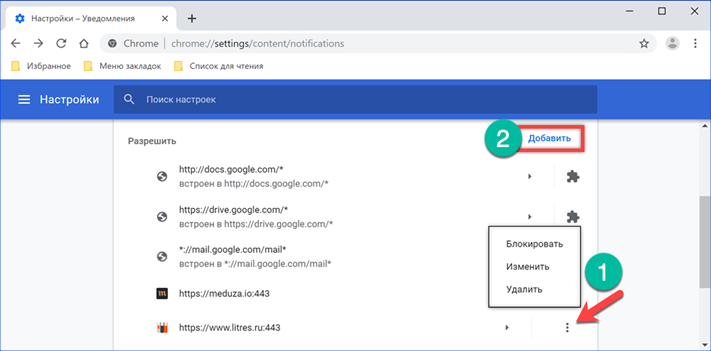
The number '1' in the screenshot marks two main blocks contained in the control section: 'Block' and 'Allow'. The first does not contain web pages by default, they appear only after self-introduction by the user. The second first displays the predefined Google rules for the company's own services. They are marked on the side with a typical extension icon and cannot be changed. This way, you can't accidentally block access to your Gmail server, Drive cloud storage, and Doks web office. The switch marked in the screenshot with a triplet simultaneously changes the behavior of the browser in relation to Web-Push on all resources.
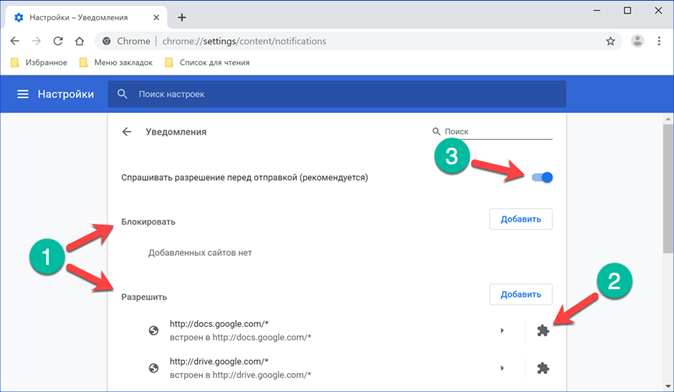
Chrome, instead of the loyal 'Ask' item, by default starts blocking notifications on all sites. The user can enable them manually from the main page by calling the control menu on the secure connection icon.
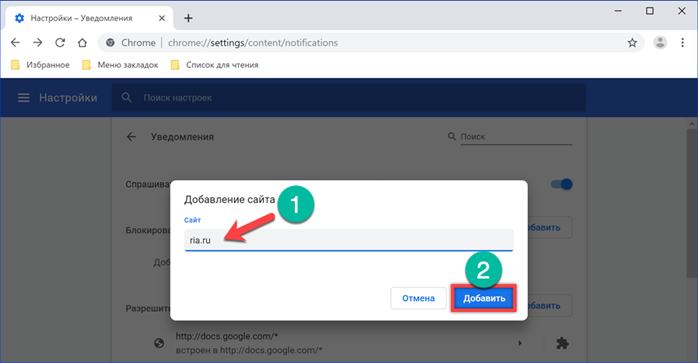
Below the predefined Google rules in the 'Allow' block are the sites added by the user. For each of them, you can call a pop-up menu of three items. Choosing between 'Allow' and 'Block' takes the page to the appropriate section of options. The middle item is for adjusting the URL of the selected resource. The 'Add' option marked with a '2' is intended for manual adding of sites and is contained in both main blocks.
The URL is typed by yourself or copied from the address bar of the browser. When you click the boxed button, Chrome will automatically shorten the link to the root page of the web resource, trimming the excess.
Finally
The tips provided by our experts allow you to customize browser notifications as efficiently as possible, preventing them from distracting the user and “bombarding” the computer with spam mailings.


