Extensions are designed to add new features not directly provided by the browser functionality. With their help, you can get a weather forecast, plan a to-do list, save articles for later reading, and solve many more tasks in various fields. Our experts show you how to install and configure extensions in Google Chrome.
Chrome Web Store
All add-on modules available for the browser are collected by the search giant in one online store.
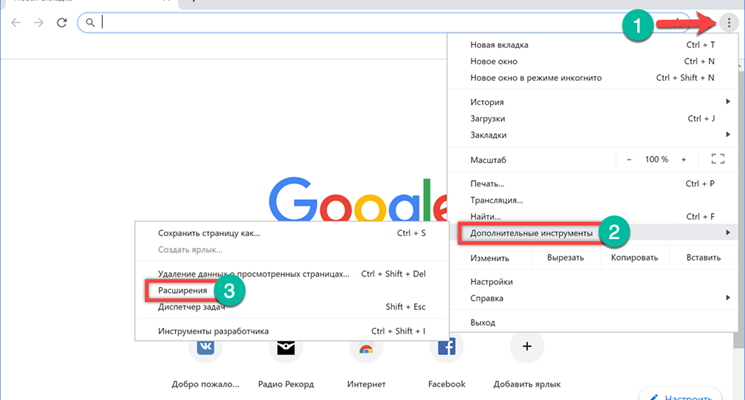
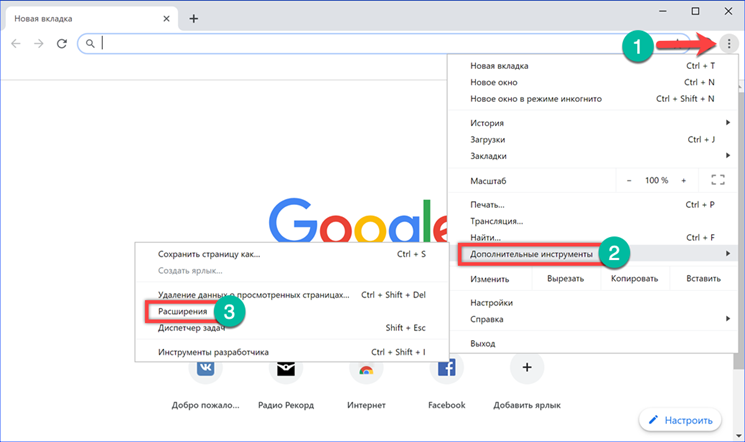
We open the Chrome control menu by clicking on the ellipsis located behind the address bar. Expand the 'Additional Tools' section. In the nested list, select the item marked in the screenshot with the number '3'.
The page that opens shows the pre-installed plugins for the Google Docs service. Users who prefer office programs Microsoft can disable them by moving the slider indicated by one to the left for each module. Click the symbol with three horizontal bars in the upper left corner of the browser to open the sidebar.

At the top, an arrow shows two view switching links. With their help, in the browser window, you can display general parameters or hotkey settings for installed add-ons. At the bottom of the panel is a link to go to the Chrome Web Store.

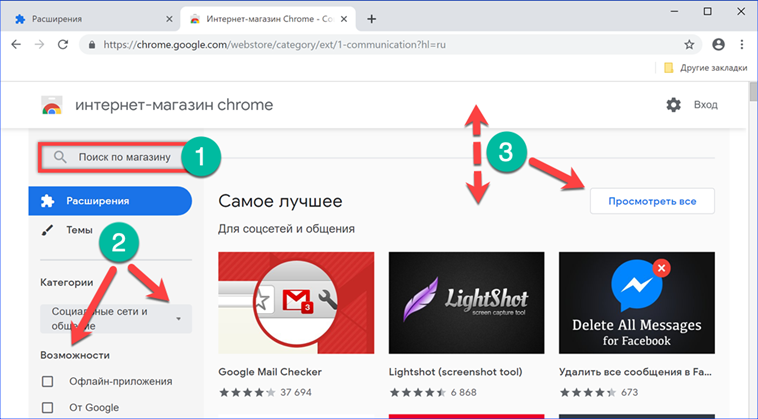
The extension gallery opens in a new tab. In structure, it resembles Google Play, an application store for mobile devices running on OS Android. On the left side of the window there is an area with selection tools. Browser add-ons can be searched by name and sorted by category, functionality, or popularity. The rest of the space is occupied by collections of modules created by Google with high user ratings and similar tasks. The content of the group is opened with the 'View All' button.
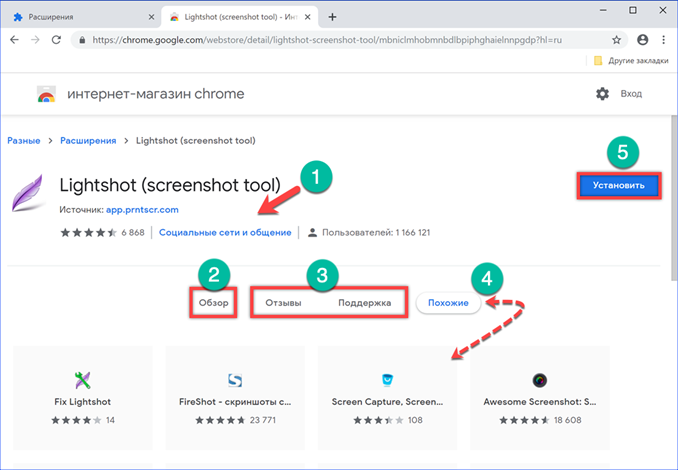
When you hover over the card with the plugin logo, it changes its appearance to display a brief description of the features. To go to the installation mode, click on the selected icon.
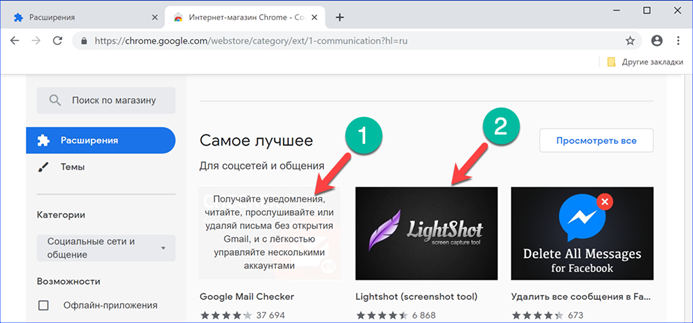
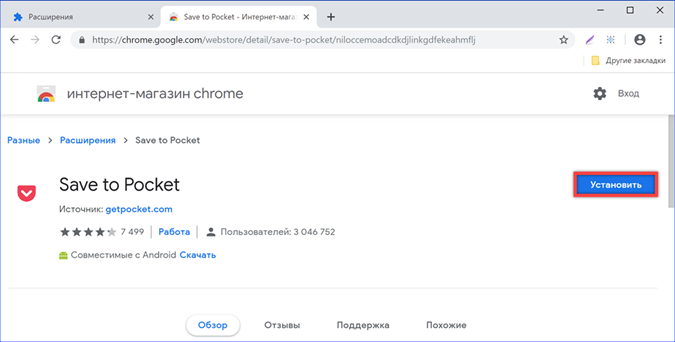
Below the name of the plugin, there are brief statistics on its use, including the number of users and the rating with the number of reviews. Below there are four buttons for switching modes. Marked with a '2' displays a complete description of the functionality and required data access permissions. The next two allow you to study user reviews or contact developer technical support. The last button displays a list of plugins with similar capabilities. After reviewing the technical specifications and reviews, click 'Install'.
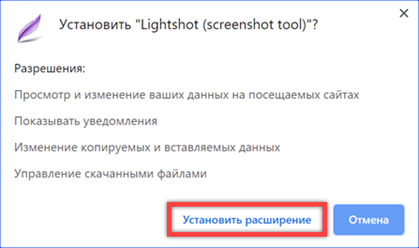
A pop-up window appears describing the permissions that the browser add-on will receive after it is installed. We confirm our decision by clicking the button highlighted in the frame.
Extension configuration
After installation, the additional features module must be configured by defining the order of its access to the pages visited on the Internet.
Open the settings section dedicated to managing Chrome extensions. On the card of the installed add-on, click 'Details'.

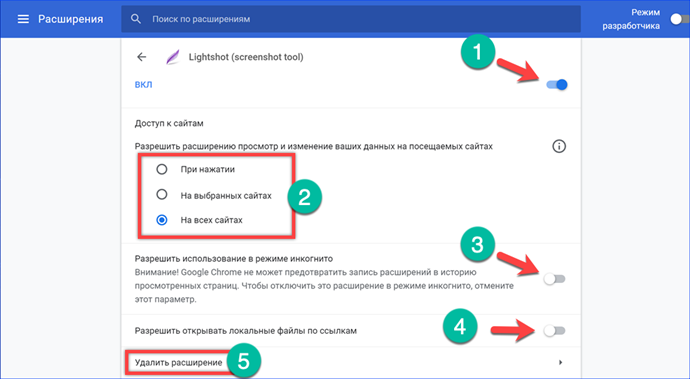
A tab with controls will open. The first checkbox marked with an arrow allows you to disable the extension without deleting it when it is not needed. The area shown by the number 'two' is for selecting the pages on which the plugin will run. By default, full access to all visited sites is allowed. You can set the add-on module to switch to activity mode only by clicking on the icon in the Chrome control panel or specify specific pages on which it will work. The next two switches are disabled by default. Marked with a '3' allows the extension to be used anonymously. The next one allows you to work with local images as with network resources. In other words, when it is turned on, you can open a previously saved picture in the browser and take a screenshot from it. The button marked with a '5' serves to remove the module.
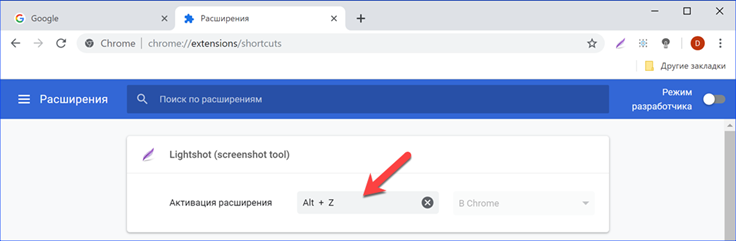
Users accustomed to performing operations with files from the keyboard can additionally switch to the hotkey configuration mode. Place the cursor in the field indicated by the arrow. We set the combination that will be used to activate the plugin.
With hotkeys enabled, you can remove the extension's icon from the browser bar to save space. Right-click on the module icon to open the drop-down list of actions. We select the item 'do not show in the Google Chrome menu'.

Plugins on the sites of software developers
For security reasons, Google has prohibited the installation of third-party extensions. For this reason, suggestions for installing add-ons found on the sites are links that take the user to the Chrome Web Store.
Let's see how such a forwarding works on the example of the Pocket lazy read service. Click on the 'Connect' button located on the program page.
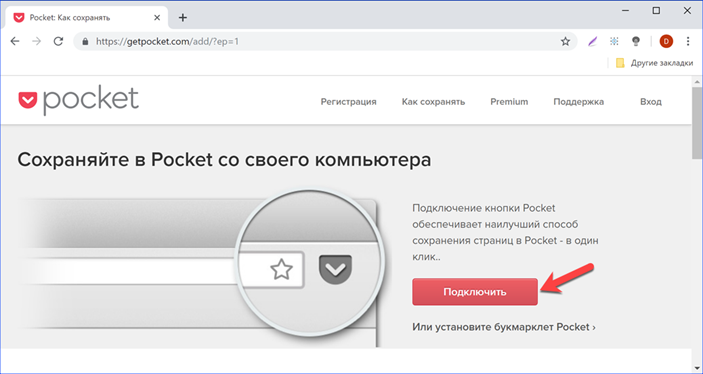
The direct link should take the user to the add-on store. No extraneous files should be loaded. This is the only way to be sure that the resulting extension is approved by Google for use in Chrome. Further steps to install the plug-in from the online store are similar to those discussed above.
Installation from a mobile device
Chrome is a cross-platform browser and can be used on both computer and mobile devices with various operating systems. Google allows users to select extensions on a smartphone or tablet for remote installation on a PC. The only condition under which such a bundle works flawlessly is the use of one account on the devices.
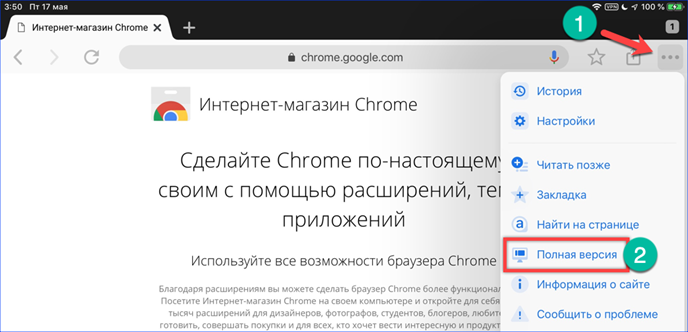
Open the mobile version of Chrome on the add-on store page. In the right corner, click on the three dots to call the control menu. We select the item 'Full version'. The site in this mode is displayed in the same way as on a computer screen.
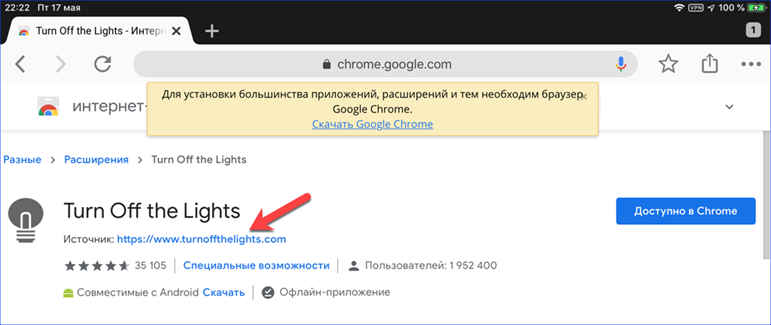
We find the required add-on and by clicking on the card with the logo go to the installation parameters.
A link to the developer's site is provided under the plugin name. Click on it to open it in a new tab.
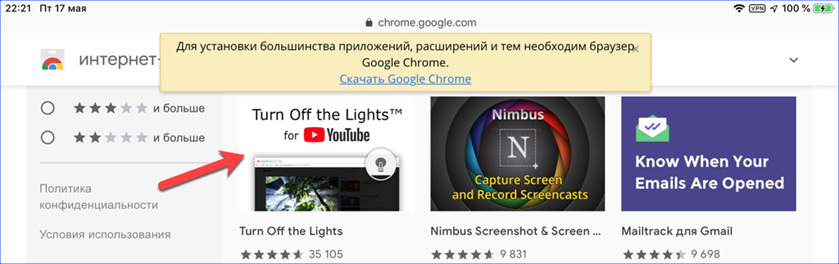
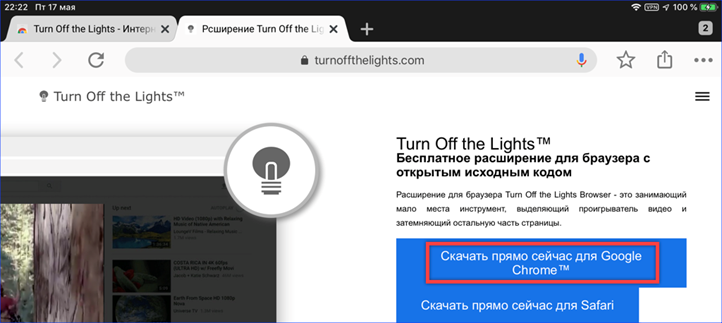
On the developer's page, we see links for downloading add-ons created for different versions of browsers. We choose the installation in Google Chrome.
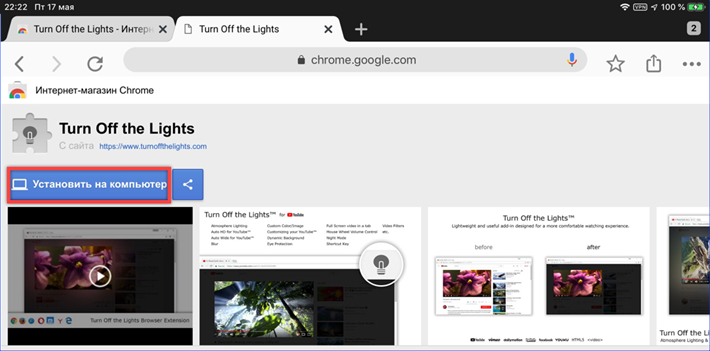
As discussed above, such a link takes the user to the online store. When logging in from the mobile version of the browser, the 'Install to Computer' button appears. Click on it and wait a few seconds during which Google checks the devices associated with the account.
We confirm the desire to perform remote installation of the add-on.

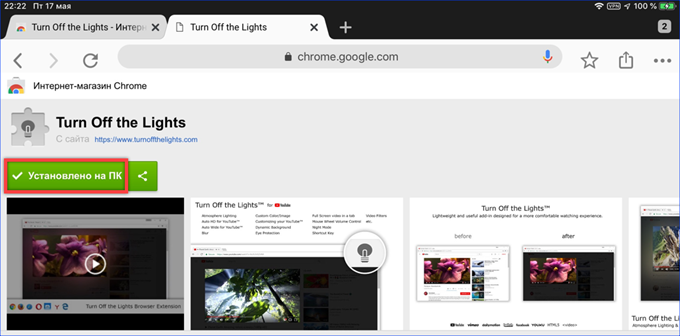
Successful execution of the requested operation is accompanied by a change in the plugin button. It turns green and displays the message 'Installed on PC'.
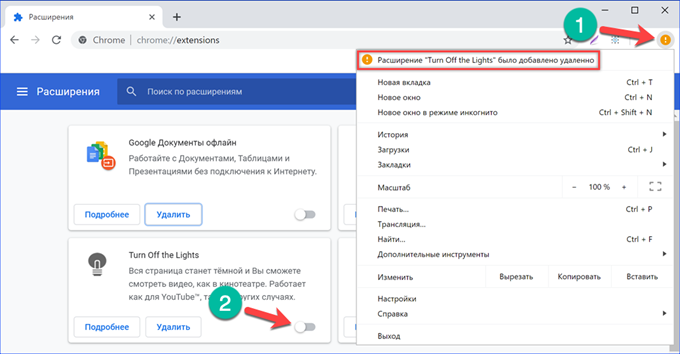
After reaching the computer, launch Chrome. In the right corner, behind the address bar, an icon will appear in the form of a yellow circle with an exclamation mark. Clicking on it opens the browser control menu. The top line contains the announcement of the remotely added plugin. The extension management section will open at the same time. By default, all components added remotely to Google Chrome are inactive. Move the slider on the 'Turn Off the Lights' card to the 'On' position.
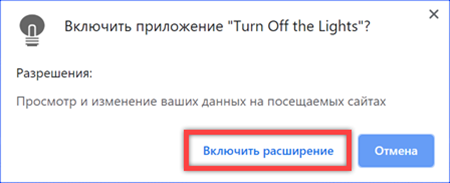
In the pop-up window, confirm the permission to activate the new extension. Only after that the plugin icon will appear in the browser panel and it will be possible to configure it for use.
Finally
In fact, all options for installing add-ons in Google Chrome boil down to using an online store created by the search giant. Our experts remind you once again that for security reasons, you should not try to use modules loaded from other sources.


