A blurry, blurry image on the monitor not only impairs workflow, but also negatively affects vision. Therefore, it is necessary to get rid of such 'picture defects', and the sooner the better. Fortunately, adjusting the clarity of the monitor is not difficult – you just need to set a suitable resolution and run ClearType in the operating system settings Windows.
Monitor sharpness refers primarily to image sharpness and detail. In addition, the quality of displaying fonts is important, because people working at a computer have to read and write a lot.
Therefore, 'adjusting the sharpness of the monitor' means setting adequate sharpness, contrast, level of detail, and also improving the display of fonts. It is worth noting that old CRT displays (if they still remain somewhere) are extremely difficult to adjust – and this is done in the parameters of the 'picture tube' itself.
Let's figure out how to adjust the sharpness of the monitor in just a few clicks.
Setting the Optimal Screen Resolution
Each LCD monitor has its own actual resolution – its matrix is equipped with a certain number of pixels. And if the actual and set number of pixels in the picture horizontally and vertically do not match, the image quality may suffer.
You can find out the actual resolution of the monitor from the technical characteristics of the device – from the instructions, from the box, or simply by googling the model. It is necessary to adjust the installed under it. Only in this case, each program point will correspond to a physical pixel – and the image will become sufficiently sharp and clear.
Instructions:
- Find out the actual resolution of your display. This information can be obtained from the instructions, from the box, or by searching the Internet for the characteristics of the model used. In some cases, this reference characteristic is indicated in the setup menu of the screen itself;
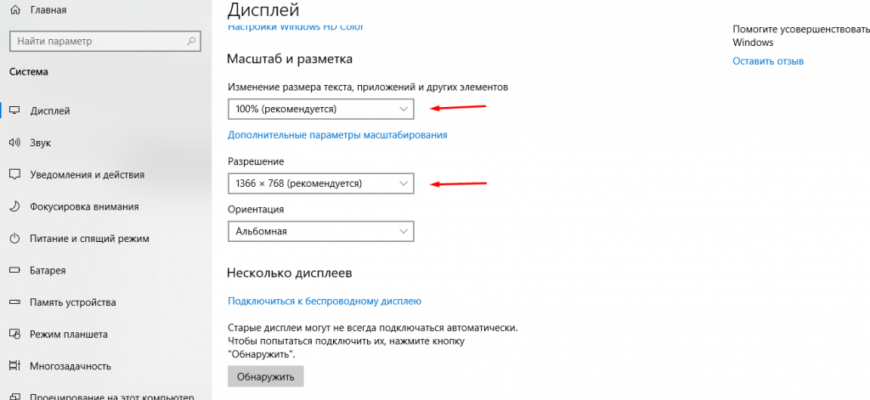
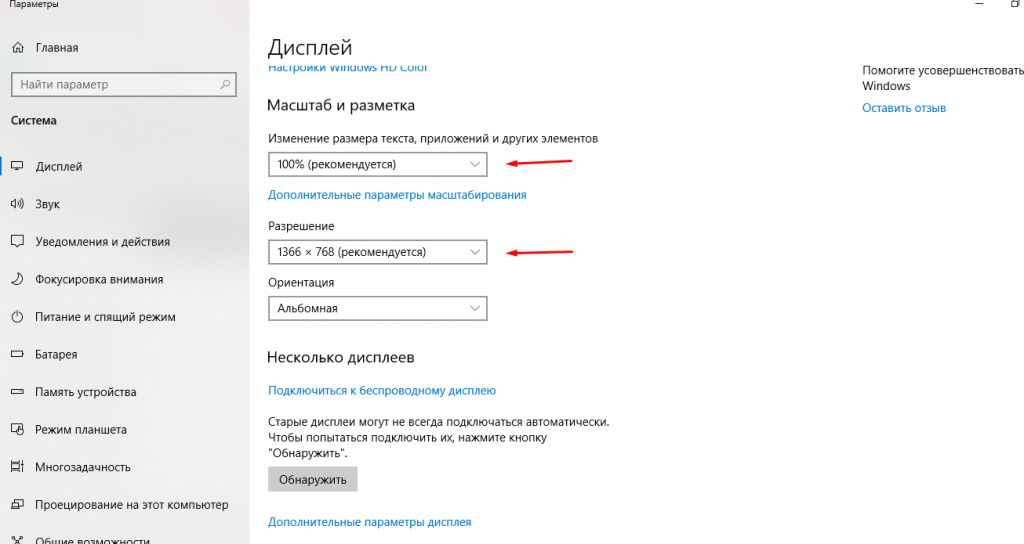
- Right-click anywhere on your desktop and select 'Display Settings' from the menu that appears. Or type “display resolutions” from the start menu.
- Select the recommended resolution or set the value to match the actual one.
If any item in the list of available pixel ratio is marked as 'Recommended' – you should select it. Windows ways to independently select the optimal display parameters.
It is also worth noting that this manual is written for the operating system Windows 10. In older versions, however, the required parameters are located in the same places, except that they can be called a little differently.
If, after setting the optimal resolution, the image became too small, then in the same 'window' 'Display', which opened after completing the second paragraph of the above instructions, you should scroll to the 'Scaling' section and select 125%.
ClearType setting
ClearType is a special font smoothing system that allows you to set the best display of text on displays with high pixel density. However, on screens with medium or even low density, it can also be very useful. In any case, it is able to significantly increase the clarity – which is what we are trying to achieve in this manual.
Instructions:
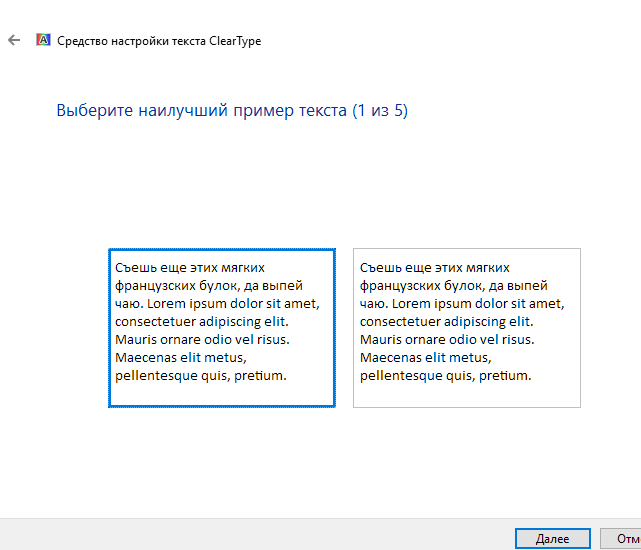
- Open Start and start typing 'ClearType'. Most likely, after the first few letters, the desired option will be offered – 'Set up ClearType text'. Feel free to click on it with the left mouse button;
- In the window that appears, check the box next to 'Enable ClearType' and click 'Next';
- If the selected screen is set to an unsuitable resolution, Windows will notify you at the next configuration step. If it is suitable, it will also inform you, but will not allow you to change it. Feel free to click 'Next' – and do so after each stage;
- Next, there will be five stages of setting the text display quality. Choose the best option, in your opinion;
- Click Finish. The display of the text on the monitor will change slightly according to the items you select.
This stage allows you to quickly and accurately adjust the clarity of the monitor, since it affects not only texts, but also some elements of the system interface.
Adjusting clarity through the menu of the monitor itself

Some display models allow you to adjust the clarity directly through the menu of the device itself. But not all that is worth considering before starting to search for the appropriate buttons.
Procedure:
- Find the 'Menu' and Control keys. They are usually located on the bottom of the monitor or on the bottom left. This panel will be required when further setting the operating parameters;
- Click the 'Menu' itself and scroll through it in search of the 'Sharpness' item. Then use the buttons 'Up-down' or 'Forward-backward' to set the desired or the most comfortable value.
- In the same parameters, you can 'play' with other display settings. Set contrast, gamma, brightness, saturation and shift as needed. You can also increase or decrease the clarity by setting other characteristics – so you can safely try until the work with the display becomes most comfortable.


